Get your keys decluttered and organized with these easy key group concepts and cute, faux-suede DIY keychains. Consists of a straightforward, step-by-step tutorial and lower sample to your Cricut chopping machine.
Key Group
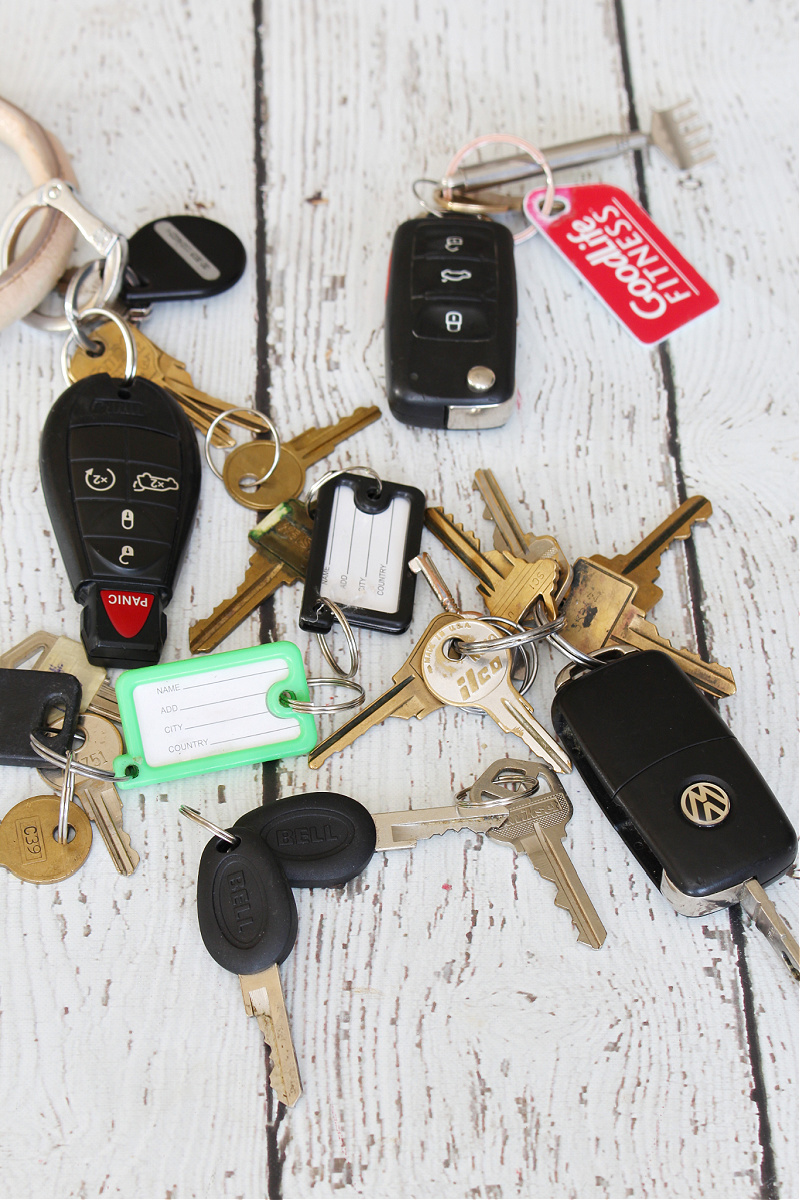
I actually haven’t finished a lot in the way in which of organizing our keys over time, however after I did slightly makeover on our entrance entry closet a number of months in the past, I noticed that our keys have been a multitude. Initially, we had a number of completely different locations round the home that numerous keys had migrated to. Secondly, we had a variety of keys that we not wanted or didn’t know what they have been for. It’s wonderful what number of keys you may truly accumulate over time!
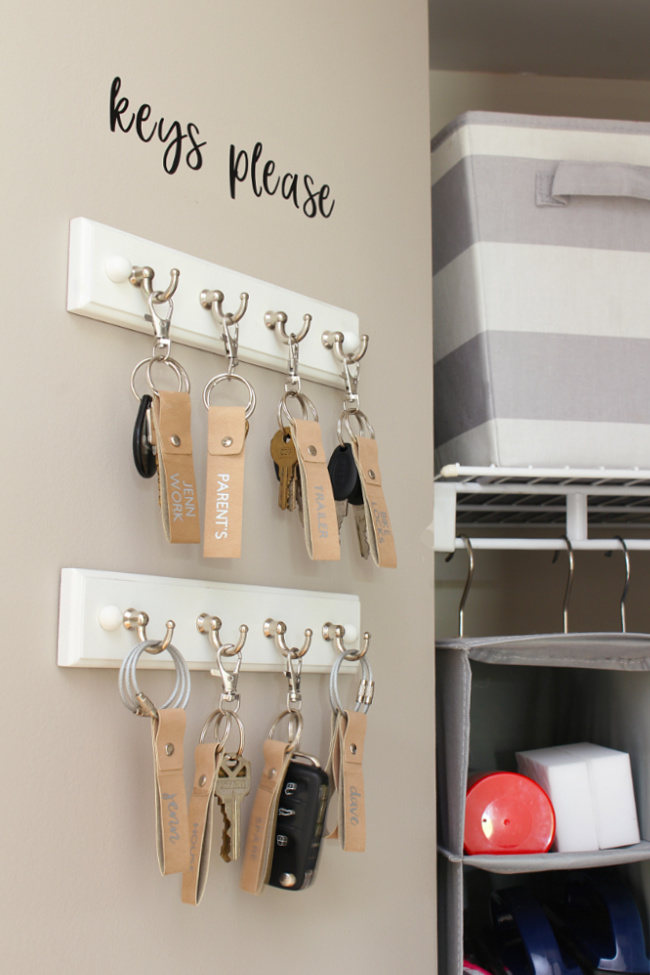
I made a decision to do a complete re-vamp of our key group system and provide you with a practical {and fairly!} answer that labored for our household. I like utilizing my Cricut machines to assist customise our house group initiatives, so I created these cute DIY key chains and added a customized vinyl “keys please” signal to tie all of it collectively. We’ve been utilizing this technique for nearly 2 months now and it’s been working nice!
This submit is sponsored by Cricut and does comprise affiliate hyperlinks. Because of this I could make a small fee {at no cost to you} from objects bought immediately by means of this submit. As at all times, all opinions are 100% my very own.
How you can Manage Your Keys
Collect your whole keys.
Go on a hunt round your property and collect up your whole key chains and free keys. Lay all of them out and do away with something that you simply don’t need and keys that you simply don’t use anymore. Be sure to know what every secret is for and set any “thriller” keys apart.
Kind your keys into classes.
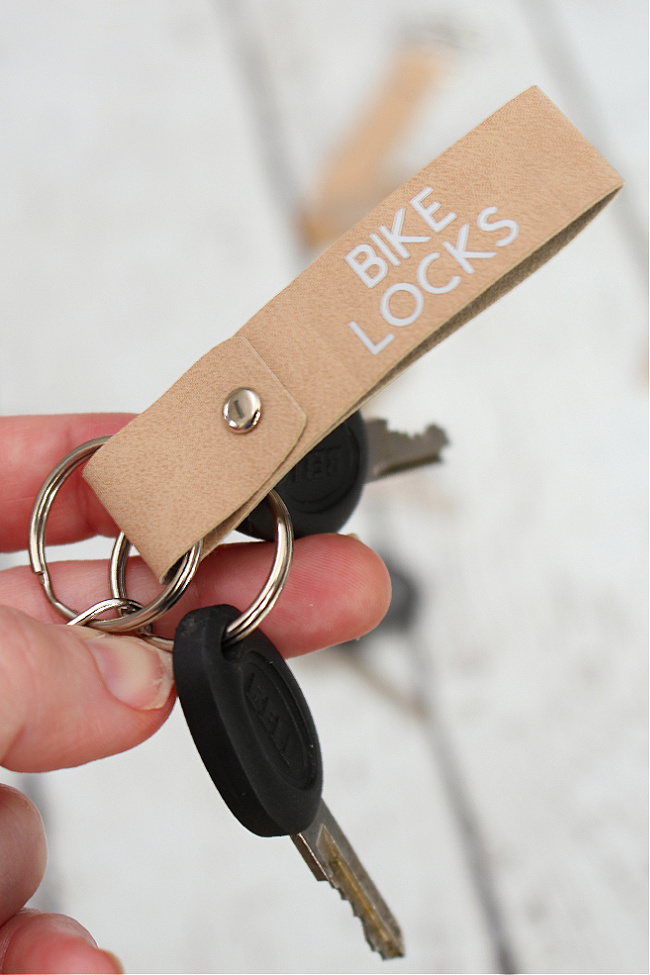
There are other ways which you can arrange you keys – simply decide one thing that works for you. Classes that you could have embody work keys, leisure car keys, occasional keys comparable to bike lock keys, back-up keys you could have for a household or neighbour’s house, , out of doors keys for sheds or different objects in your yard, spare keys, and so forth. You may additionally have loyalty card key fobs that you simply need to hold.
Group comparable keys collectively.
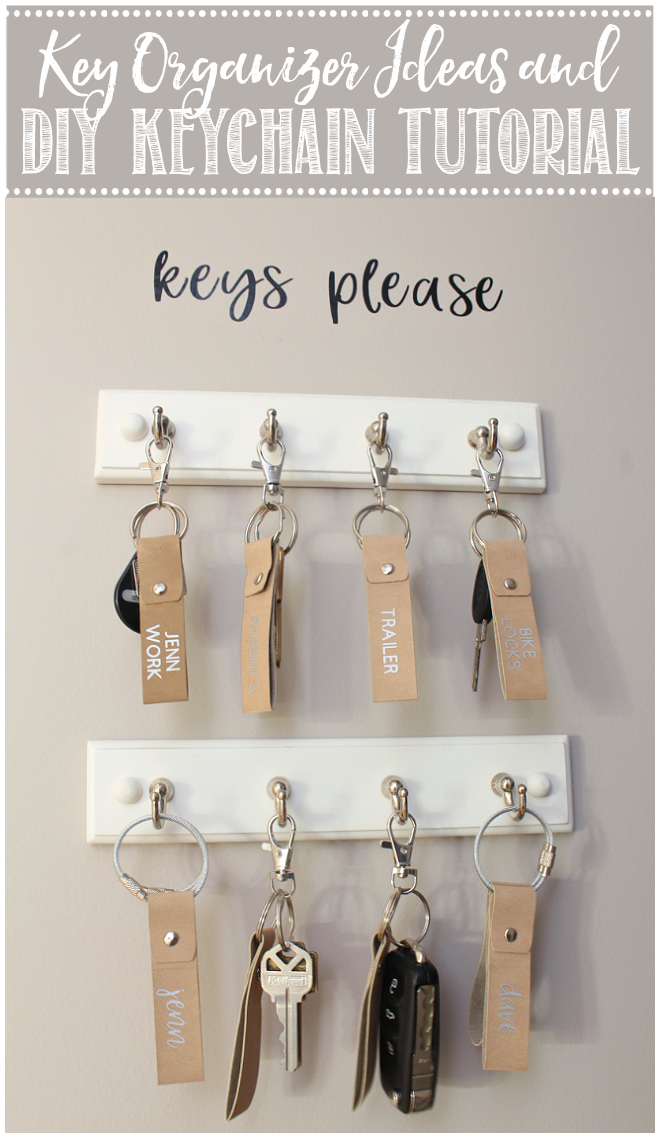
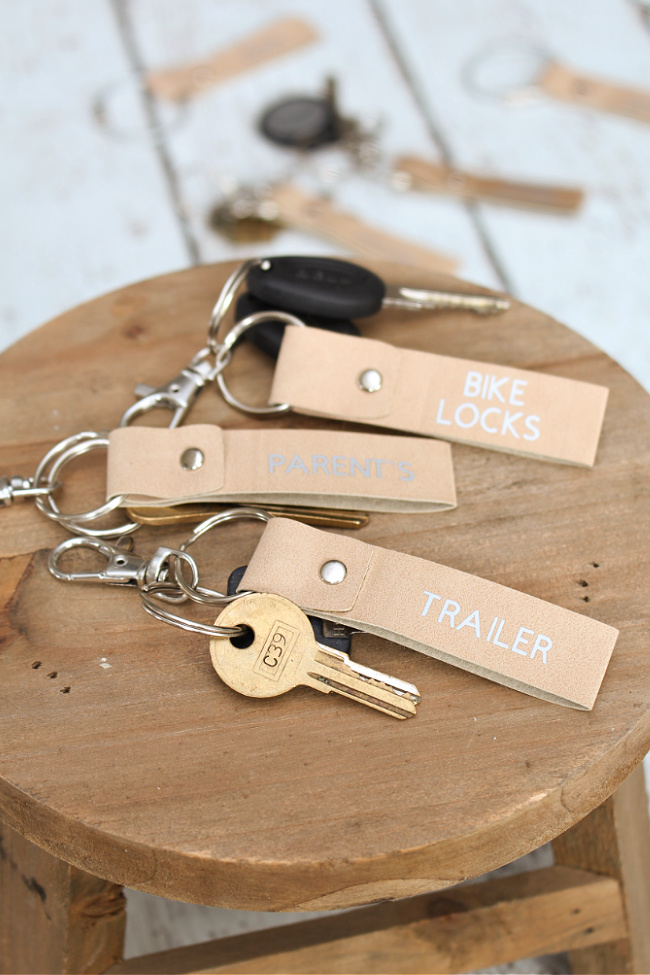
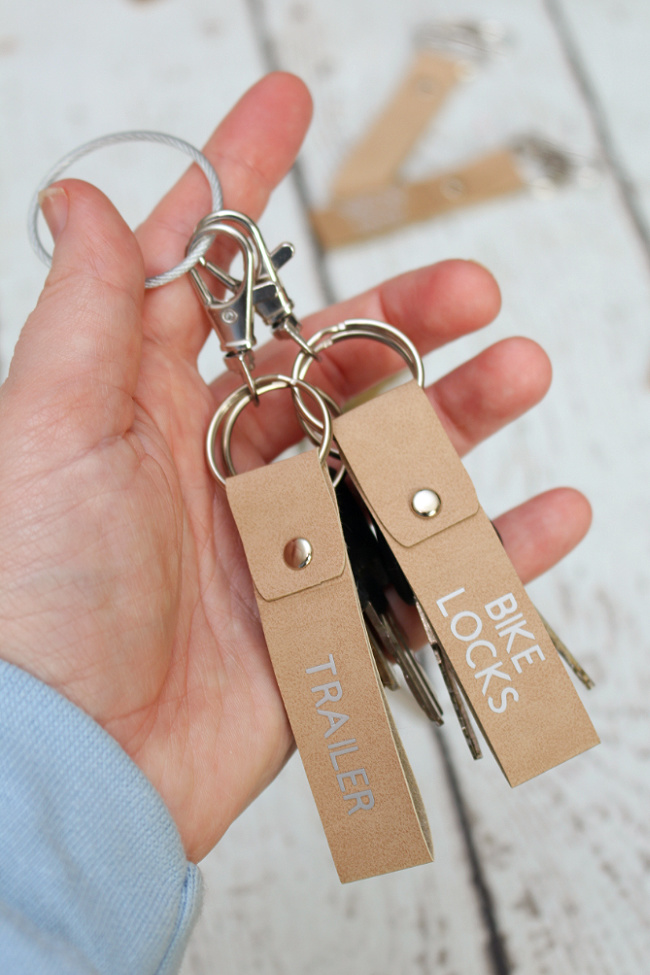
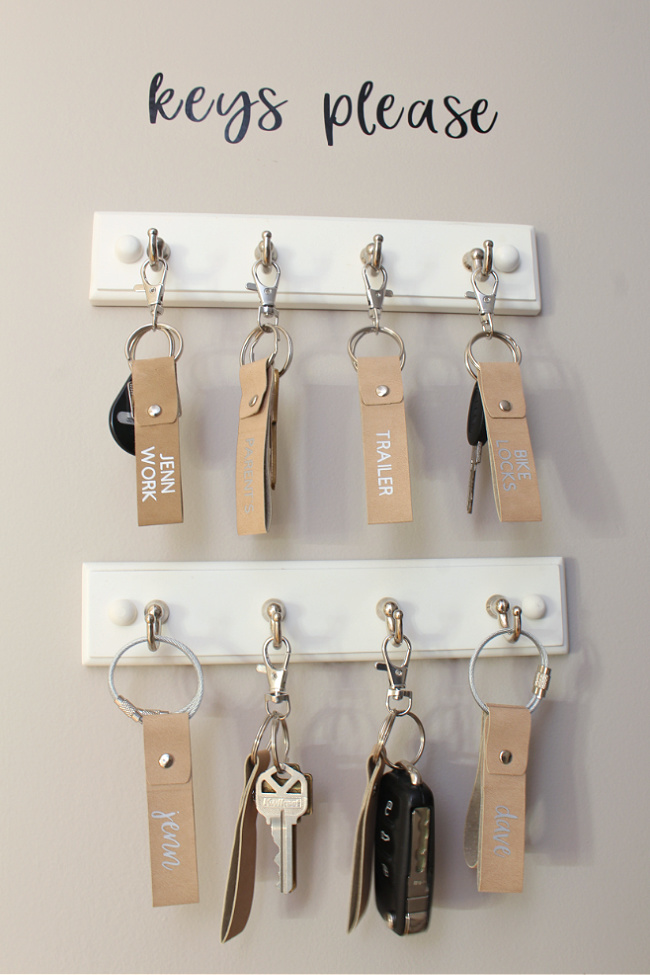
After getting all the pieces sorted, you may group your keys onto a number of completely different key chains. There isn’t a proper or incorrect means to do that. It simply must be someday that works to your particular wants. First, you need to select what to maintain in your on a regular basis keyring. For our system, my husband and I every have one major key chain with all of our keys that we use each day like our automobile key and mail key. Personally I prefer to hold this key chain as minimal as attainable so I’m solely carrying the keys that I would like repeatedly. I then made further key chains for these keys that we don’t use frequently or keys that would wish to change between Dave and I. For instance, we’ve one key chain for our trailer keys, one for our bike locks, one for all of our spare home keys, and so forth. These could be clipped onto our major key ring as wanted.
Label your keys.
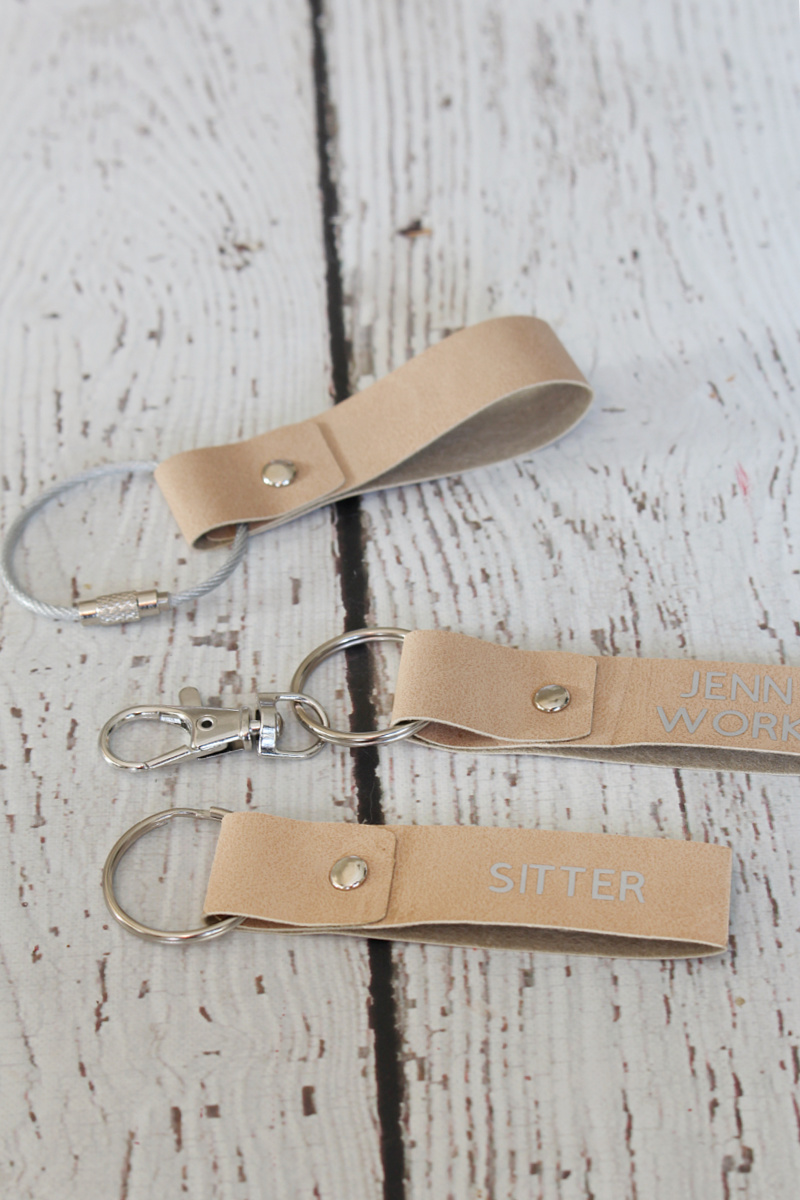
Labelling your keys {particularly people who you don’t use repeatedly} helps to maintain issues organized, save time, and permits everybody which will want the keys to search out them simply. There are numerous methods which you can label your keys comparable to colour coding, immediately including a small label to the important thing itself, or utilizing labelled keychains. I like a extra unified look so the labelled keychains labored completely for us.
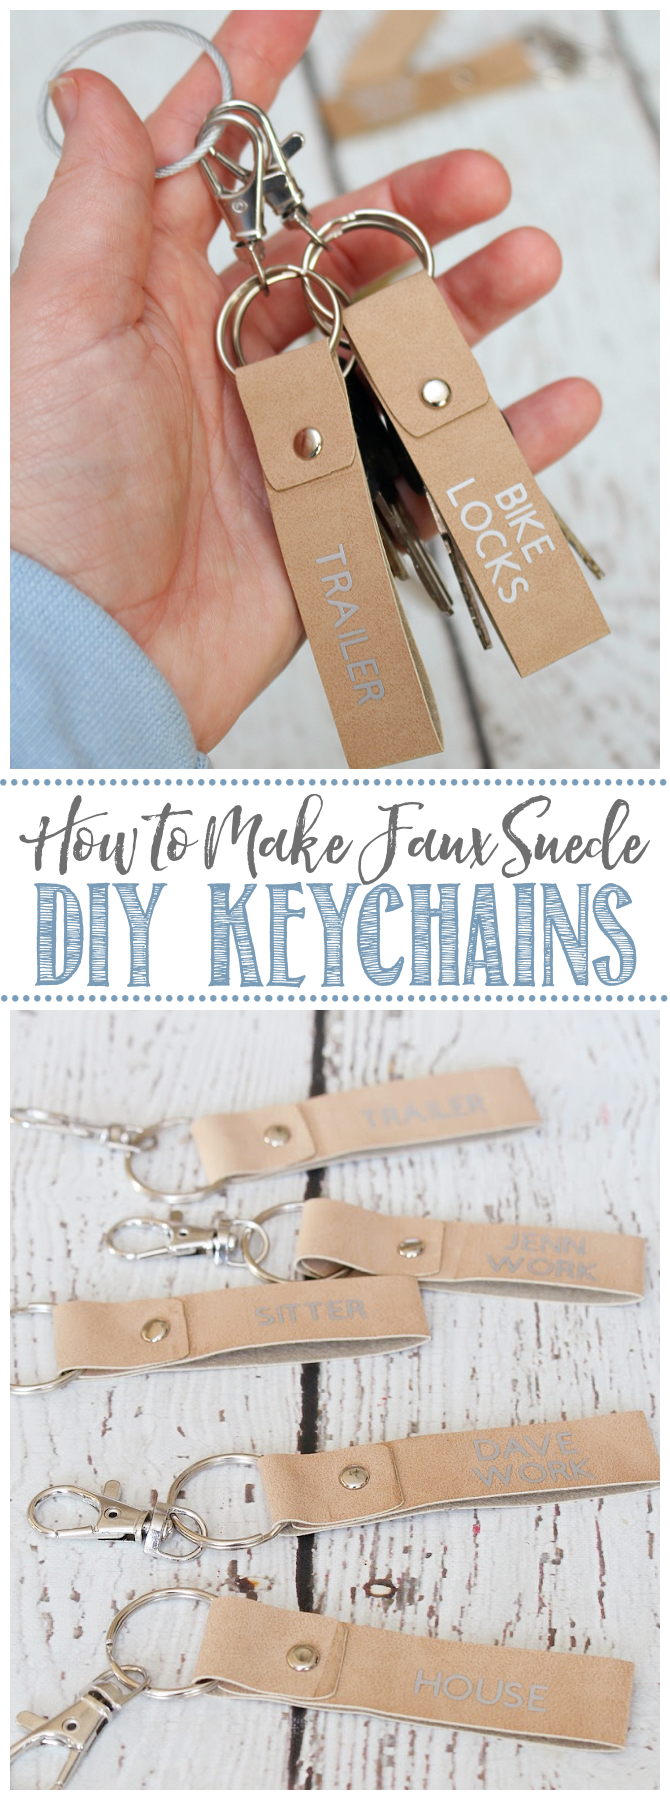
Faux Suede DIY Keychain with Cricut
Are you able to create your personal customized DIY keychain? These are so fast and simple to make in your Cricut and could be custom-made nevertheless you’d like. They work effectively as a cute reward thought too!

Supplies
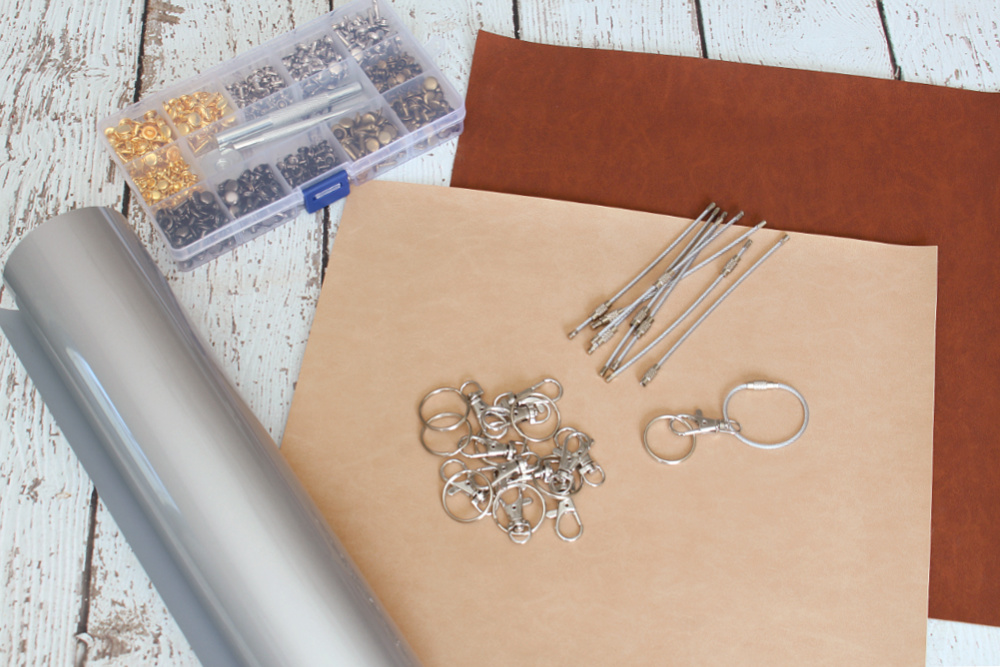
To Make
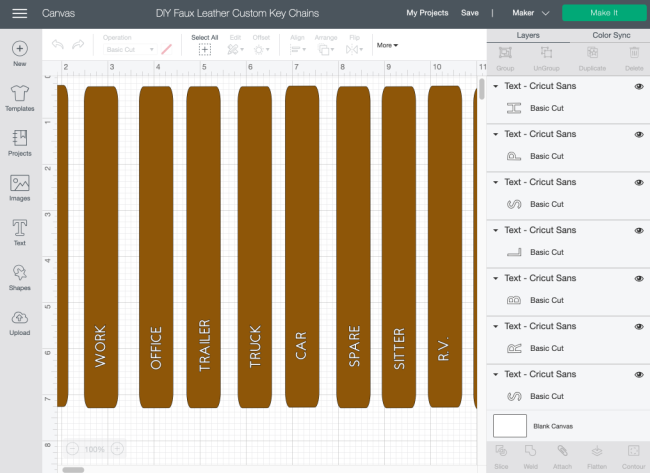
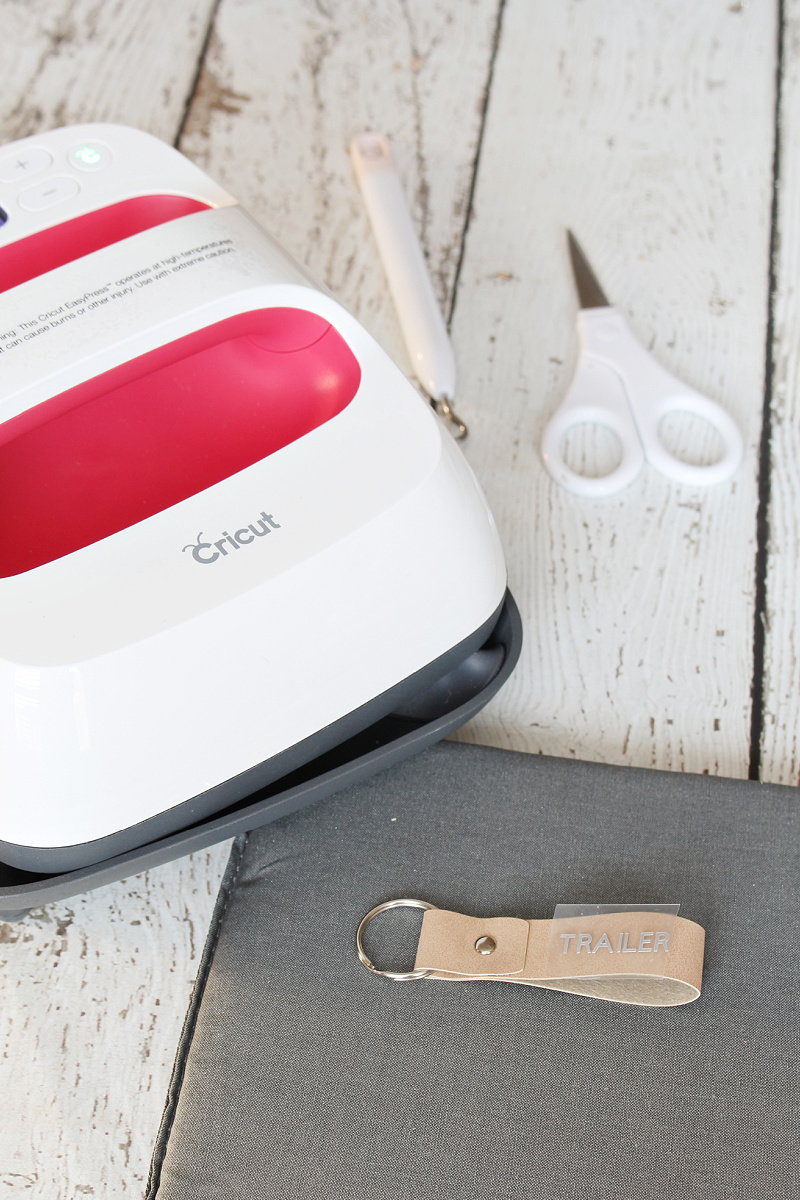
Step 1: Open Cricut Design House
Open the important thing fob template in Cricut Design House utilizing this hyperlink and click on on customise. I added a wide range of phrase labels that you could be need to use, however you may edit any of those to create your personal customized labels or wording. It’s also possible to change the font sort and sizing if you need. When you’re comfortable along with your design, click on on “Make It” within the high proper hand nook.
Step 2: Minimize the Phrase Labels
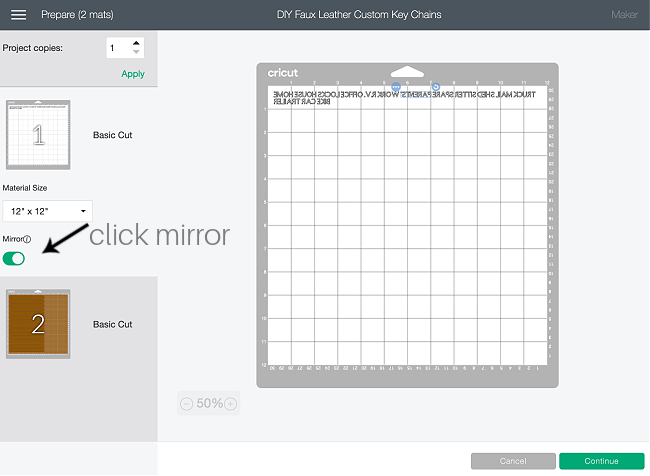
For those who’re including phrase labels to your keychain, these would be the first lower that you simply’ll make. Choose your iron-on materials from the “Browse All Supplies” and be sure that the premium fine-point blade is loaded into your Cricut. Place the iron-on sheet face down {shiny facet down} onto the inexperienced normal grip mat and load it into the Cricut and hit the lower button.
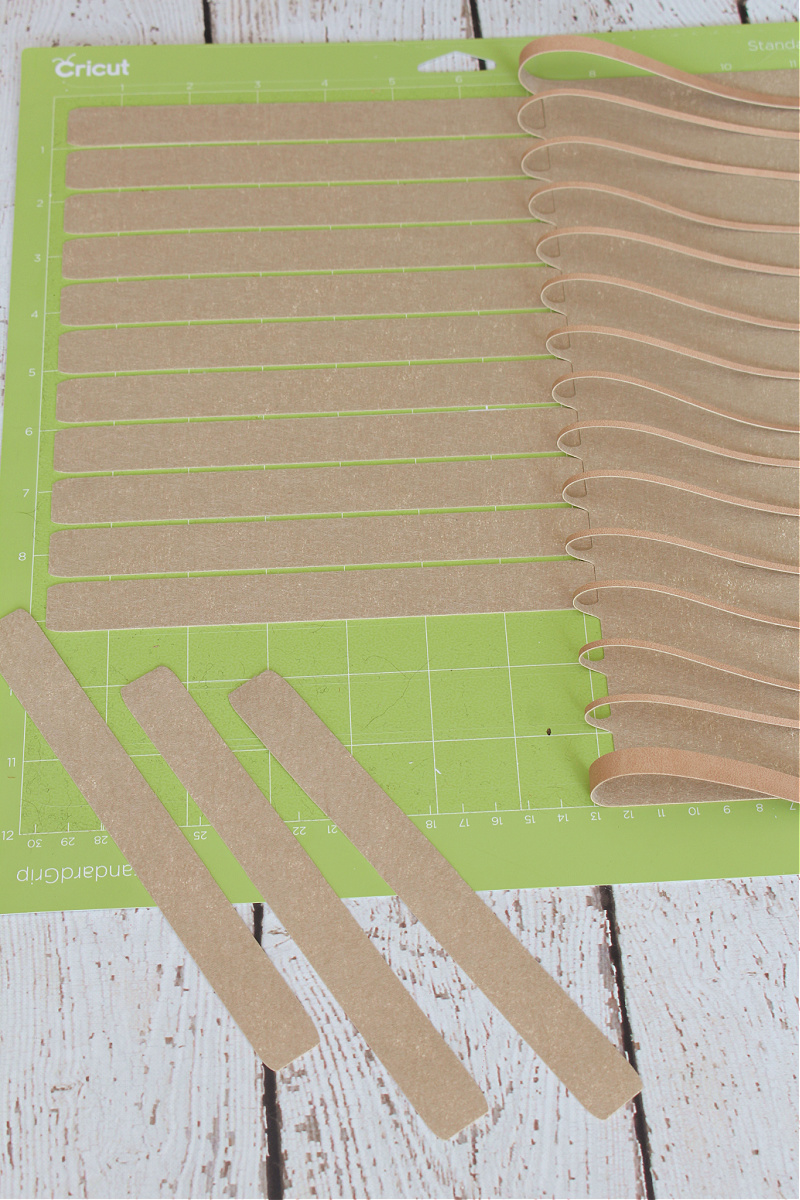
Step 3: Minimize the Faux Leather-based.
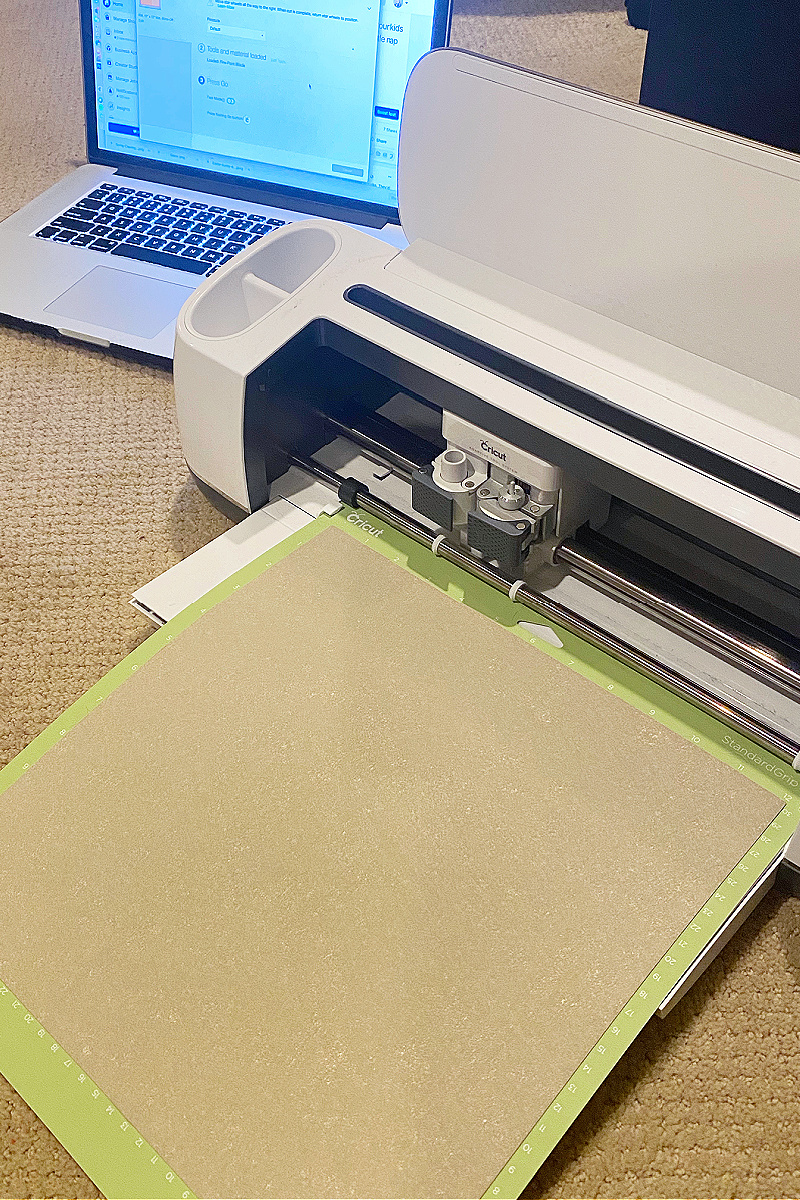
When you’ve lower the iron-on supplies, it’s time to chop that fake suede! When prompted, choose Faux Suede from the “Browse All Supplies” choice. Be certain that the superb level chopping blade is loaded into your Cricut and slide the small white “stars” on the Cricut curler all the way in which over to the proper in order that they don’t depart any indentations in your leather-based materials.
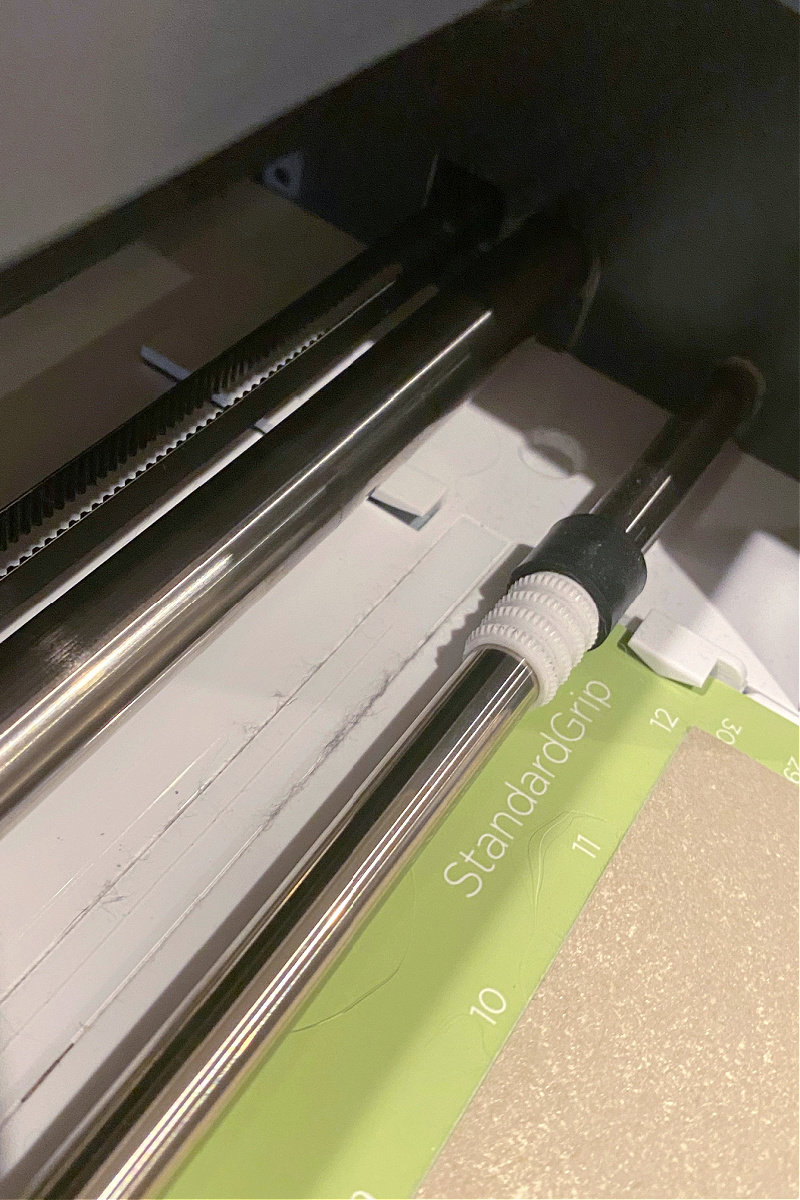
Place the fake leather-based proper facet down on the inexperienced normal grip mat. Load the mat into your chopping machine and comply with the on-screen prompts to finish chopping.
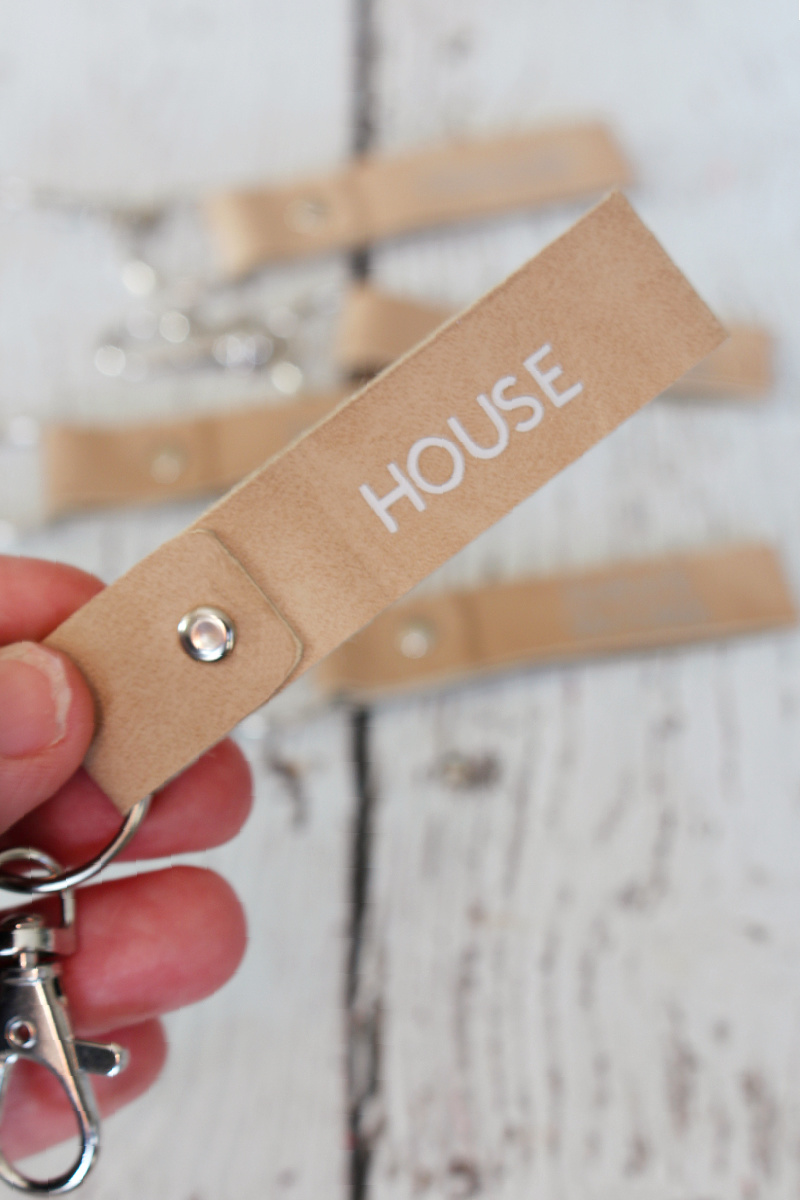
Step 4: Assemble the keychain.
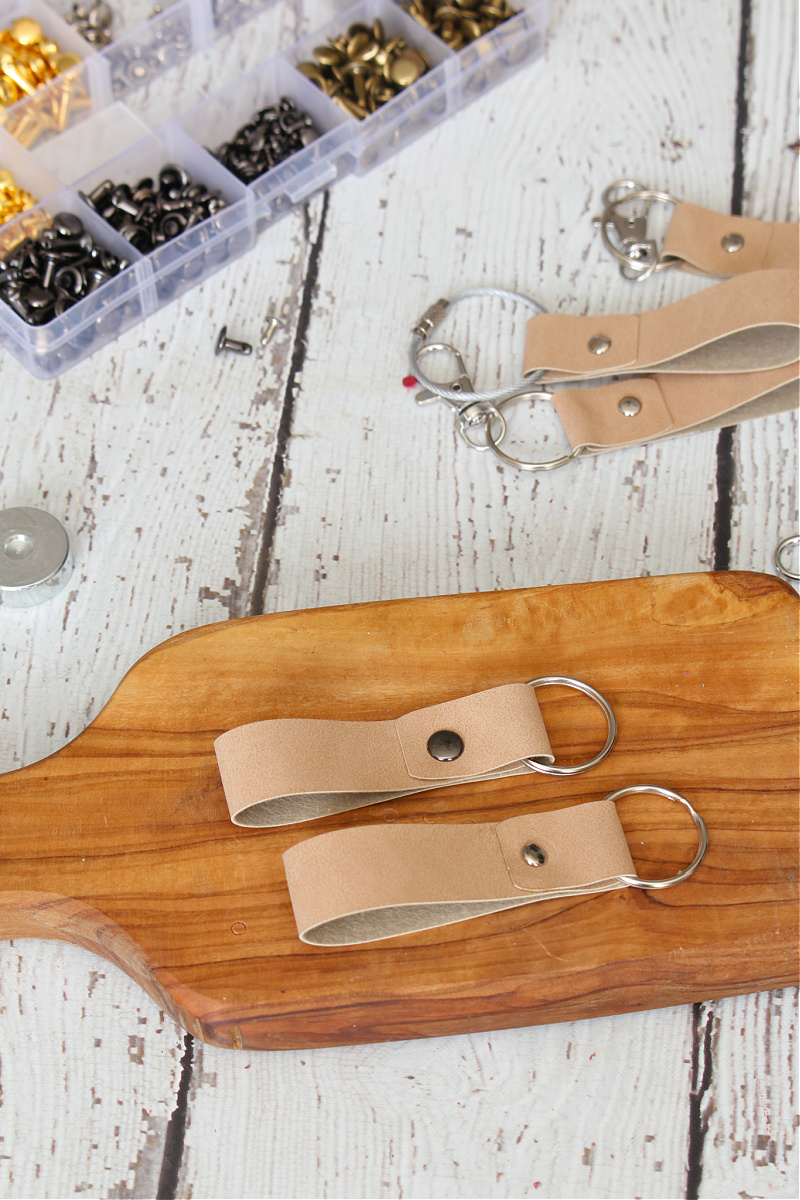
Peel away the surplus suede and take away the important thing fobs from the mat.
Fold over the underside of the fake suede to the scale you prefer to your key fob, leaving roughly simply over an inch on the high to fold over. Safe with slightly Krazy glue on the overlap and press to safe.
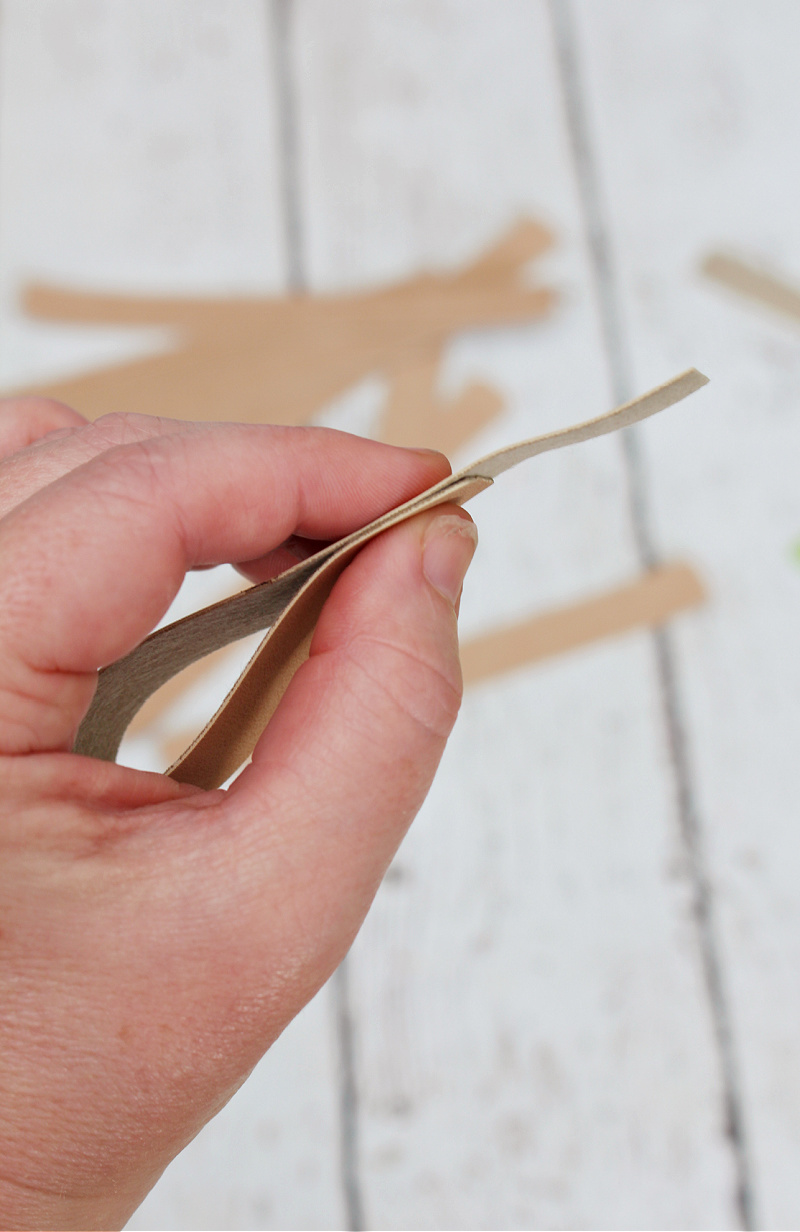
Place the important thing chain ring by means of the surplus suede. Add slightly glue to the highest of the overap and fold over to safe.
You need to depart slightly area between the ring and the suede so it could possibly transfer freely.
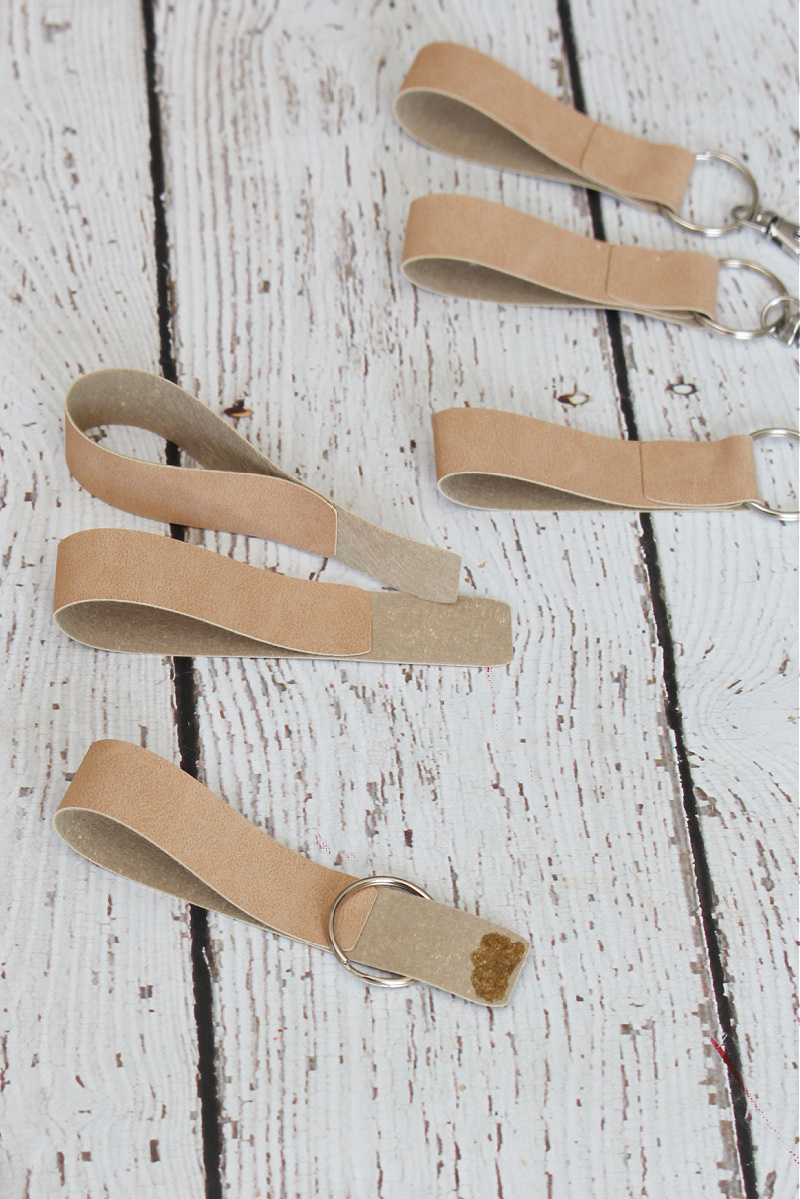
I used the strong key rings for my keychain, however you need to use the cable loops in order for you to have the ability to take away the rings {see high key ring beneath}. The cable loops could possibly be added to both choice.
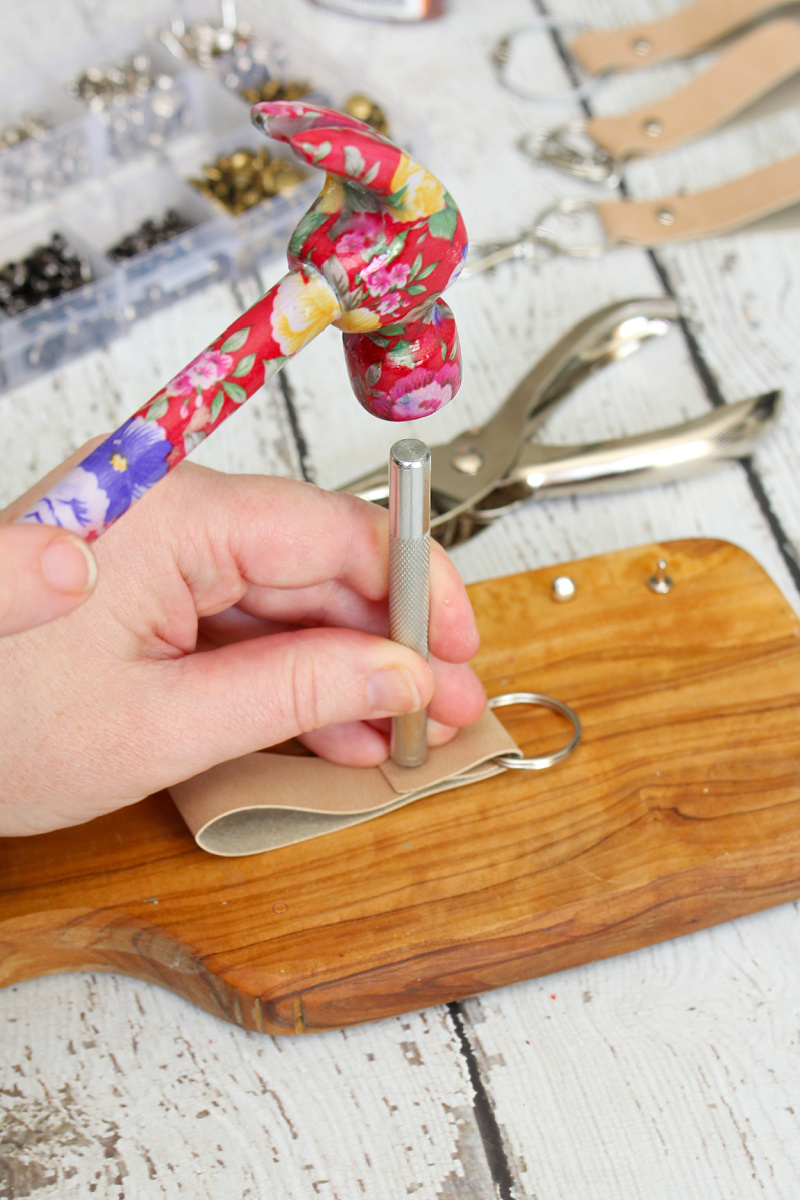
Step 5: Add the Rivets.
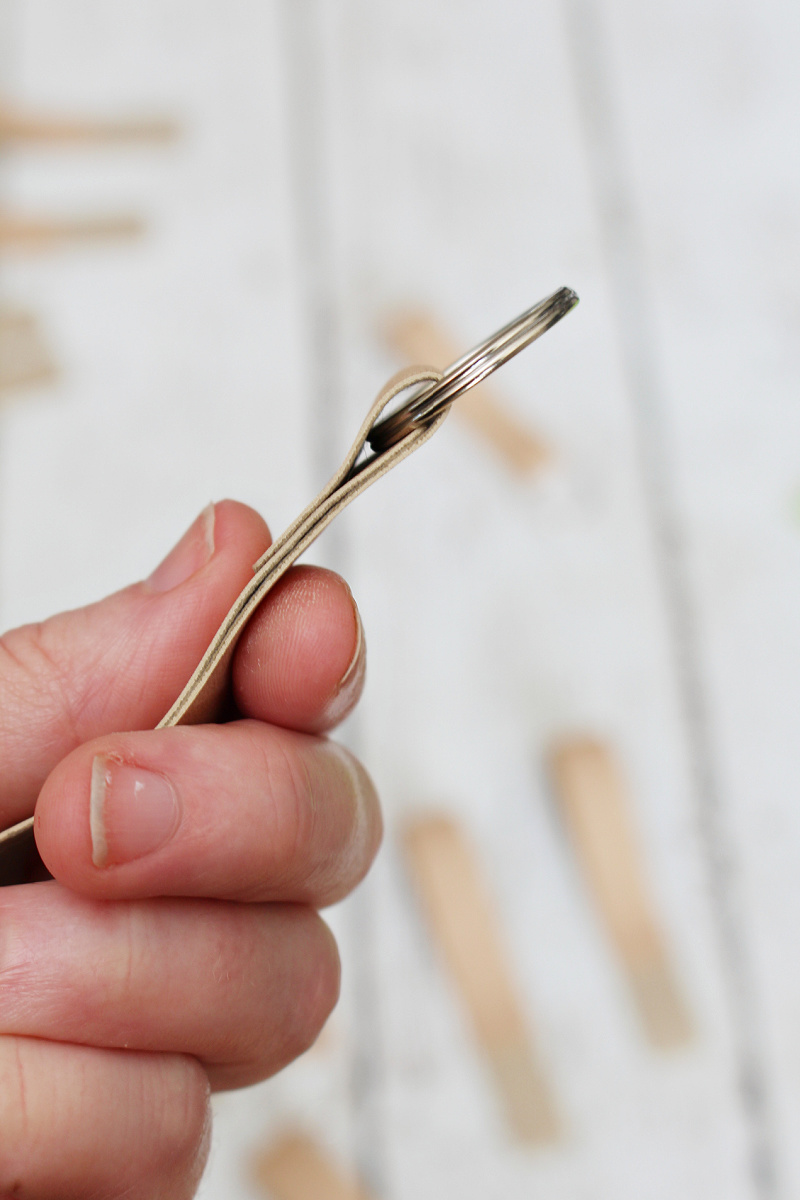
The rivets are extra ornamental than practical however I believe they create a way more polished look. Punch a gap by means of the important thing fob in direction of the underside of the overlap. The opening punch that got here with my rivet equipment labored superb for punching by means of all three layers of the fake suede. {NOTE: There’s additionally a gap setting device that you need to use for thicker supplies.} Place the rivet with the longer level by means of the opening.
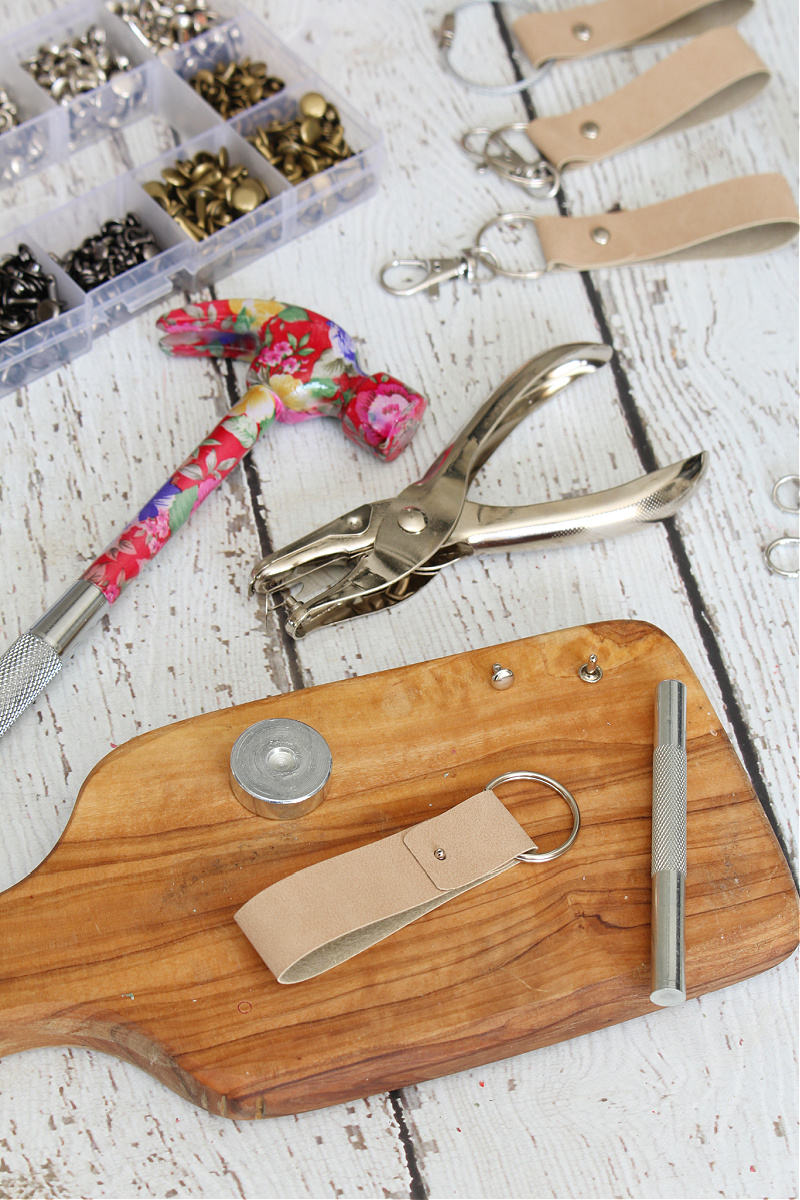
Place the spherical steel base below the rivet {this prevents the rivet from getting dented and secures it extra in place for hammering} and high with the rivet cap. Place the setting device over the rivet cap and maintain in place firmly. Hammer firmly on the highest of the setting device a number of instances till the rivet is about in place.
I ended up utilizing the smaller, silver rivets for my keychains, however right here’s an instance of the bigger, darker coloured rivets for comparability. Both measurement works!
Step 6: Weed the iron-on.
Trim down the surplus vinyl away from the phrases so it’s simpler to work with. Weed away the detrimental area utilizing the weeding device. You ought to be left with the phrases caught on the clear liner. Utilizing scissors, fastidiously separate the phrases.
Step 7: Iron-on the labels.
Pre-heat the EasyPress to 280F {140C}. {NOTE: I at all times seek advice from the Cricut warmth information after I’m utilizing iron-on supplies.}. Place the fake suede strips on the Cricut EasyPress mat and frivolously press the EasyPress over the fabric for five seconds to preheat. Take away the EasyPress and place the labels the place you prefer to them in your key fob. Press the EasyPress in place for 30 seconds and take away. Permit the fabric to chill barely earlier than fastidiously eradicating the clear backing. Repeat for your whole keychains.
Step 8: Add your keys.
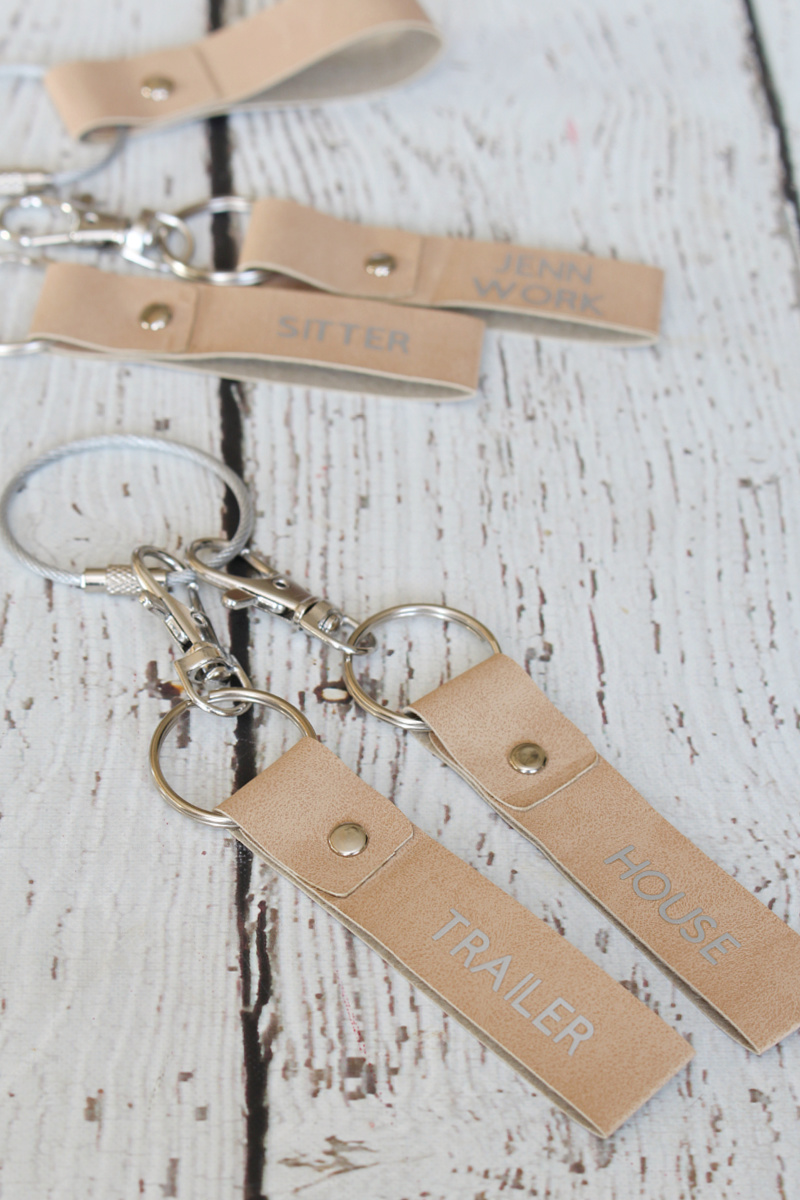
Now for the ending touches! Add your keys and determine the way you need to retailer your keychains. I connected two key chain rings to every clip – one for the label key fob and one for the keys themselves. This enables me to simply take the keys off the keychain {with out the label} if I’m going to be including them briefly to a bigger keychain.
For those who choose, you may depart each the keychain and keys connected and simply clip them to a spherical loop ring. The clip makes it fast and simple to safe the keys to a different keychain with out fumbling round making an attempt to take the person keys on and off the ring.
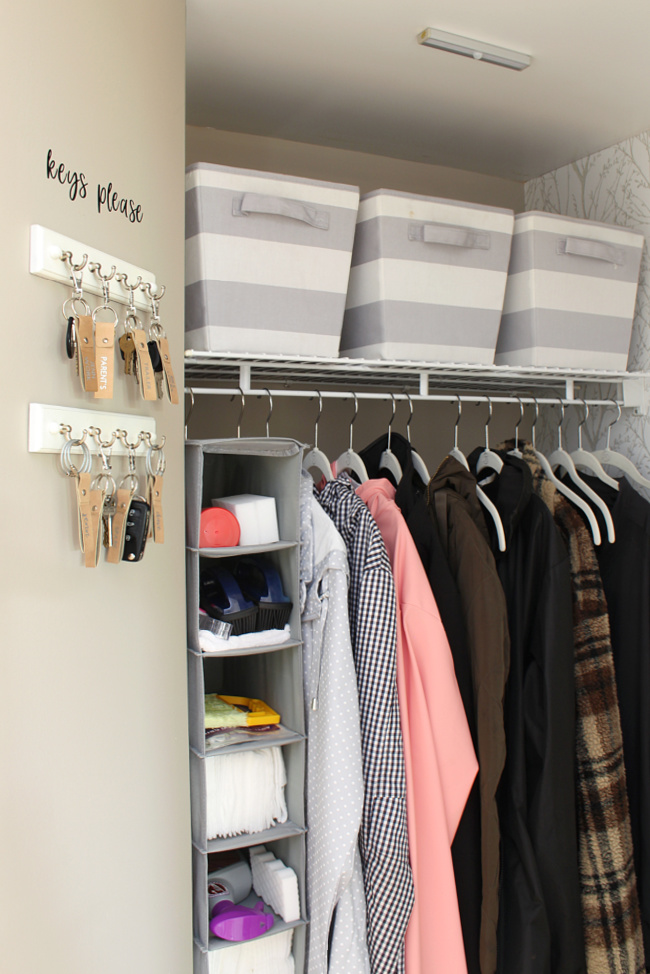
Your key chains could possibly be saved in a reasonably basket or grasp them from the wall from some easy wall hooks. We’ve a basket by our entrance door for our on a regular basis keychains and our entrance entryway closet holds the remainder of them. I added a cute vinyl “keys please” wall label above our hooks.
How you can Customise Your Key Chain
There are such a lot of other ways which you can change up these key chains to make them your personal! These could be good to present as presents or personalize your personal on a regular basis keychain with a particular contact. Listed here are a number of concepts for you
- add a monogram
- use a particular date {this may be good for a marriage reward!}
- write an inspirational phrase
- create a cut-out design on one facet of the important thing chain. For instance, you might use a small coronary heart or star or put a small home silhouette for your home key.
- add a geometrical design – stripes, dots, chevron – with iron-on vinyl
- change up the colours. I needed to maintain these specific key chains impartial since we’ll be mixing them round, however there are such a lot of enjoyable colours that you might use! There are 10 colours out there within the fake leather-based or begin with a impartial base and add your colour with the iron-on vinyl.
Suggestions for Slicing Faux Suede {or Leather-based} on a Cricut
Use the premium superb tip chopping blade.
One of many advantages of utilizing fake suede or fake leather-based vs real leather-based is that you simply don’t need to buy the deep chopping blade. All you want it the premium superb tip chopping blade that comes along with your machine. For those who’re utilizing non-Cricut model fake suede or leather-based, nevertheless, you must do a check lower first to make it possible for the fabric isn’t too thick for the premium superb tip blade.
Safe the fake suede correctly to the chopping mat.
Lay the fake suede face down onto the chopping mat. This retains your mat cleaner and will assist to increase the lifetime of your mat. I typically use the inexperienced normal grip mat for chopping fake suede. You need to use a brayer or rolling pin over the suede to make sure that it’s adhered effectively. If it nonetheless isn’t sticking, use the purple robust grip mat.
Select the proper lower settings.
When chopping, decide the fake suede (paper skinny) setting in Cricut Design House. You will want to maneuver the dial to customized in your Discover sequence machine to get to this menu. In case you are inserting your suede face facet down make sure you mirror your picture if it isn’t a symmetrical design {i.e. for letters or different designs that aren’t symmetrical again and entrance}.
I hope you discover these key organizer concepts helpful and have enjoyable making your personal DIY keychain. There are such a lot of other ways which you can customise them to make them your personal!
Extra Residence Group Tasks Utilizing Cricut
For those who’re searching for extra concepts on tips on how to use your Cricut for house group initiatives, take a look at these posts…
DIY Leather-based Wire Wraps
How you can Manage Your Spices and Spice Labels
Customized Towels