Get your entire cords and cables organized as soon as and for all with these DIY wire organizers. They’re simple to customise with a Cricut machine and maintain your cables simple to entry and wrap again up.
This publish is sponsored by Cricut and does include affiliate hyperlinks. Which means that I’ll make a small fee without charge to you from objects bought by way of the hyperlinks. As at all times, all opinions are 100% my very own. Thank-you to your help!
Cord Group
With the entire expertise nowadays, you’re sure to have a pile of cords, chargers, and different random cables cluttering up your house. Effectively, at this time, I’m going that can assist you get all of these cords decluttered and arranged as soon as and for all – with a bit assist from my Cricut!
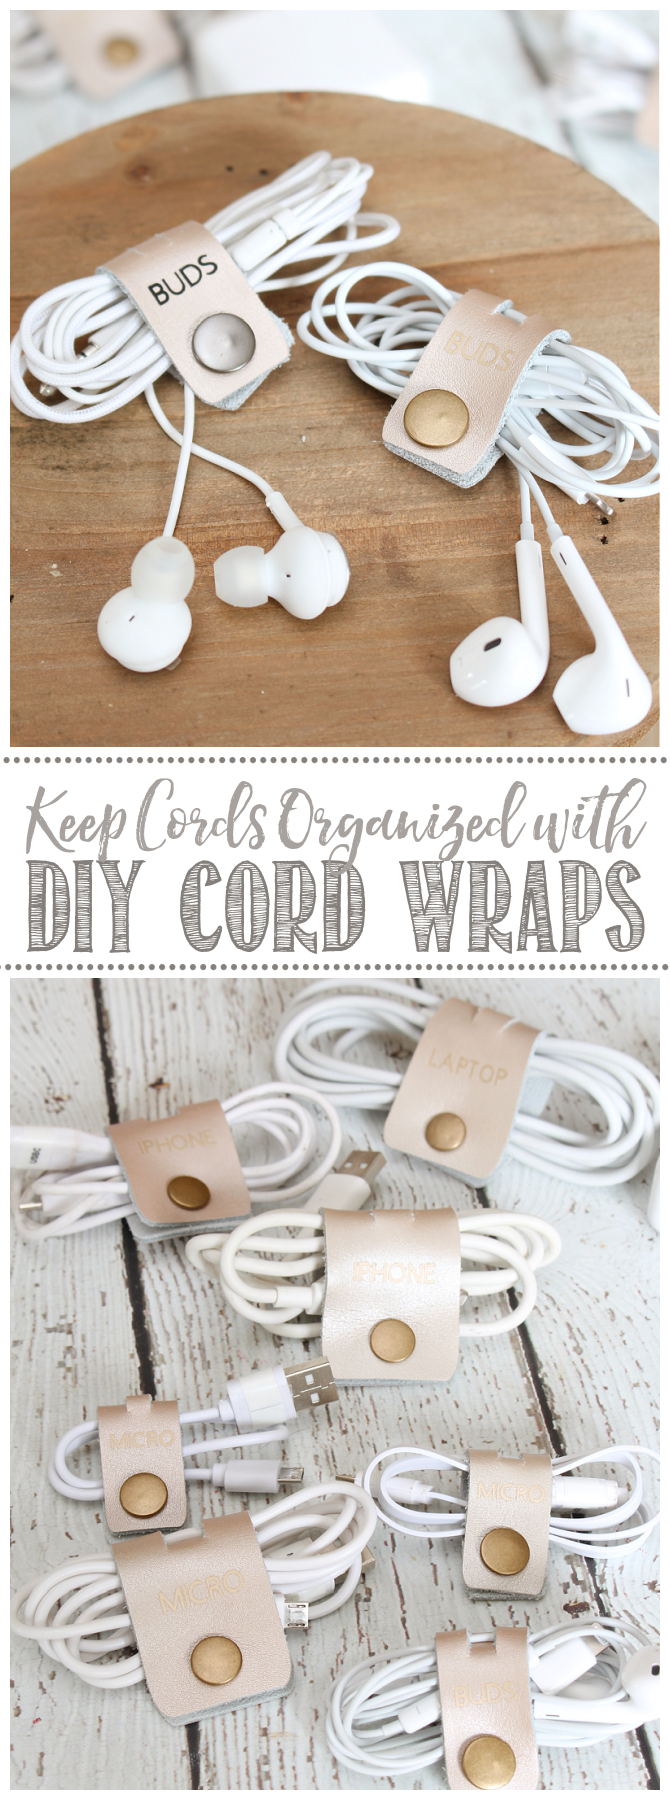
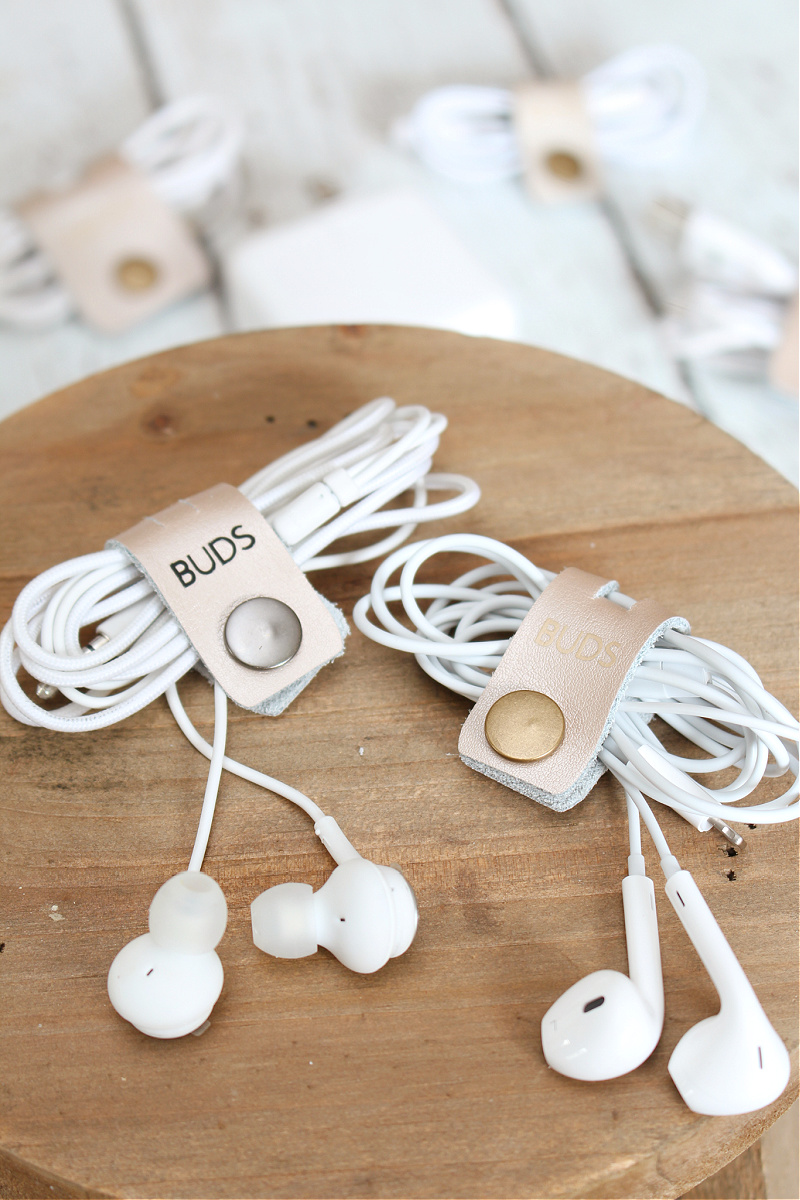
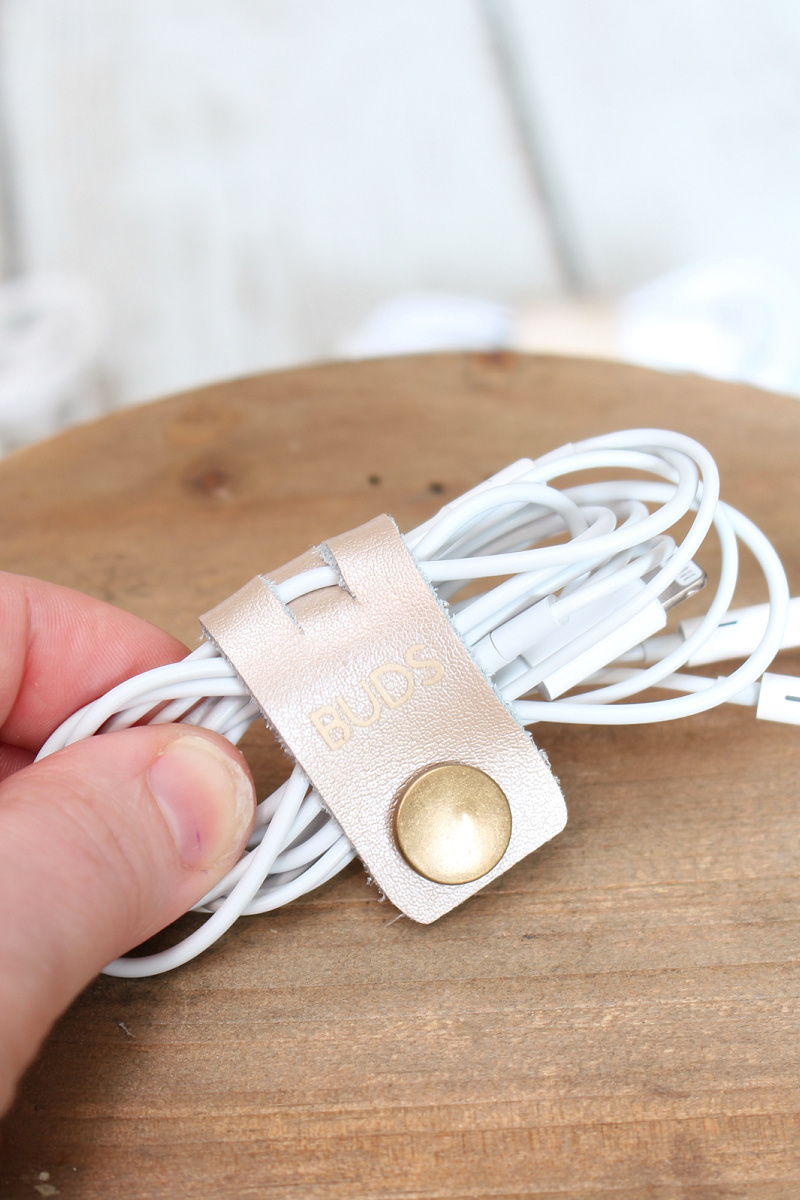
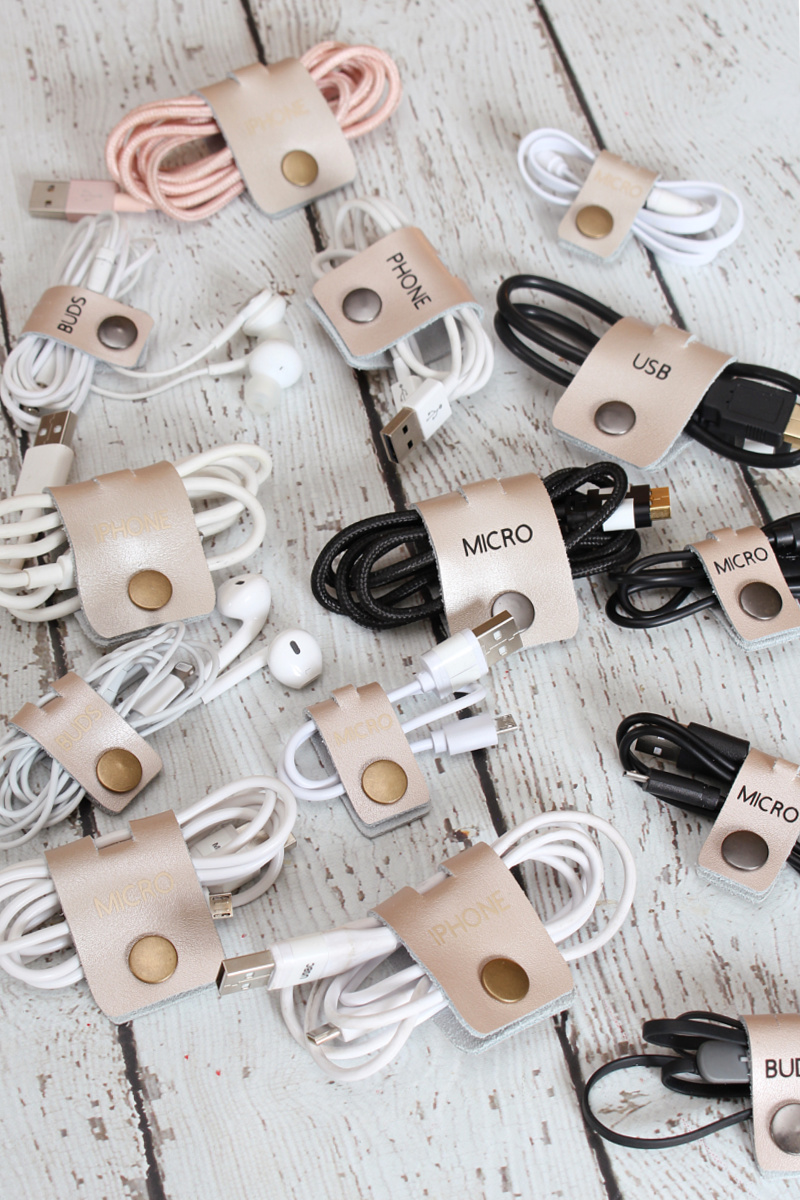
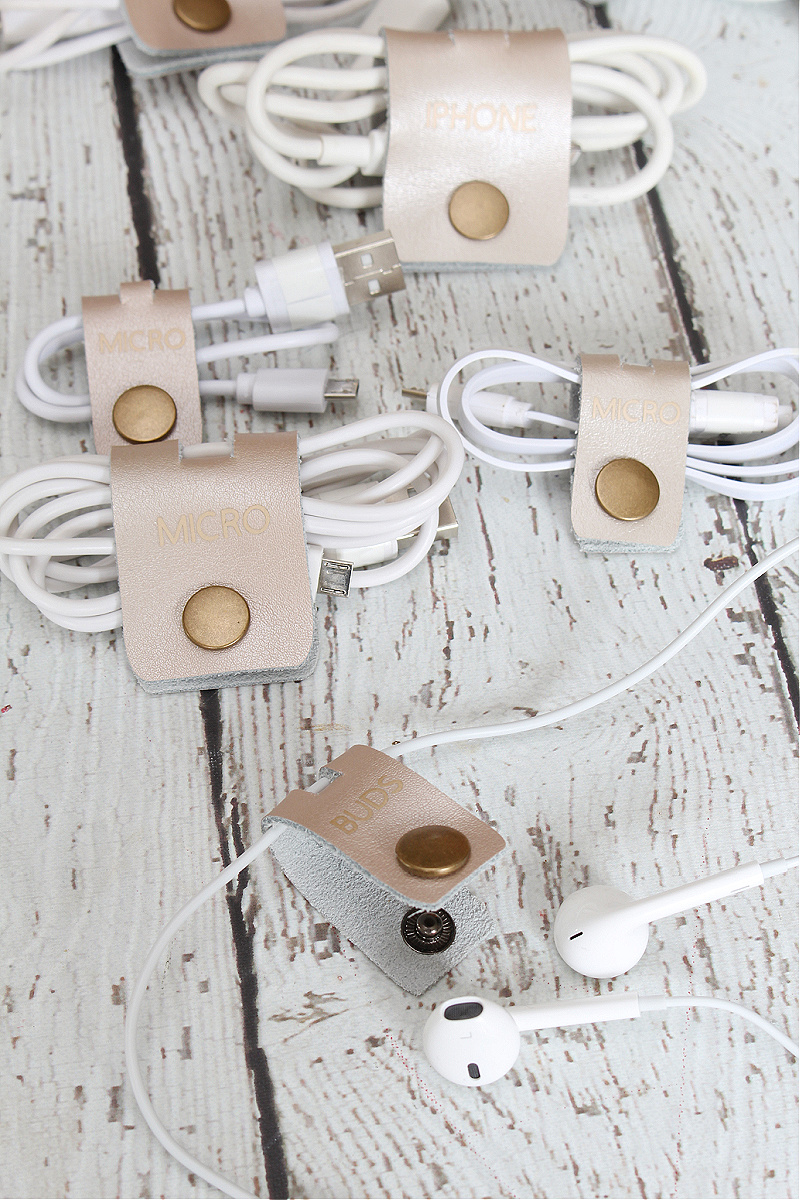
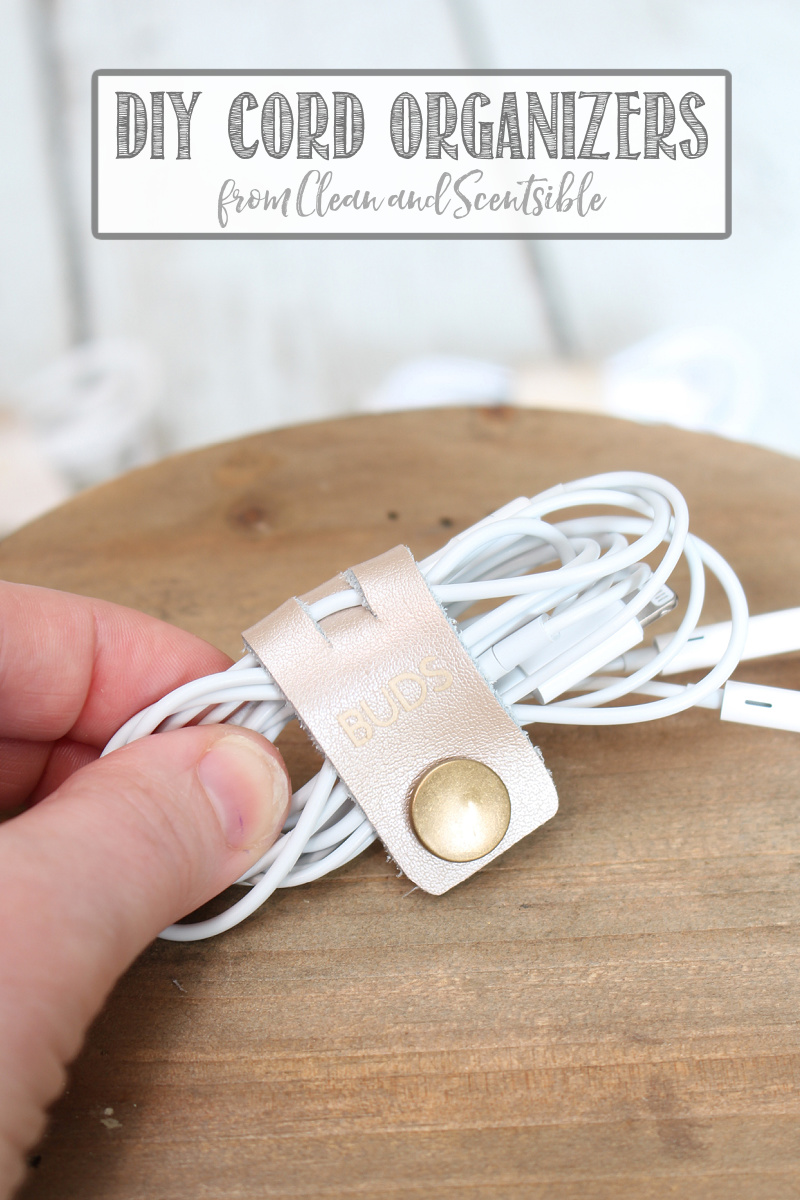
My new favourite challenge is these cute {and tremendous useful!} DIY wire organizers. These might be custom-made nevertheless you’d like and are the proper approach to grasp your wire group. They’re designed to remain on the wire, so even while you undo the cords, you’ll at all times know the place to search out the wrap. Make them to your complete household and don’t overlook to make a couple of extras for presents!
The best way to Manage Your Cords
Are you able to sort out that tangled pile of cords and cables? Taking a bit time now to get them decluttered and sorted will prevent lots of time in the long term. And doubtless forestall lots of complications and some arguments too! 😉
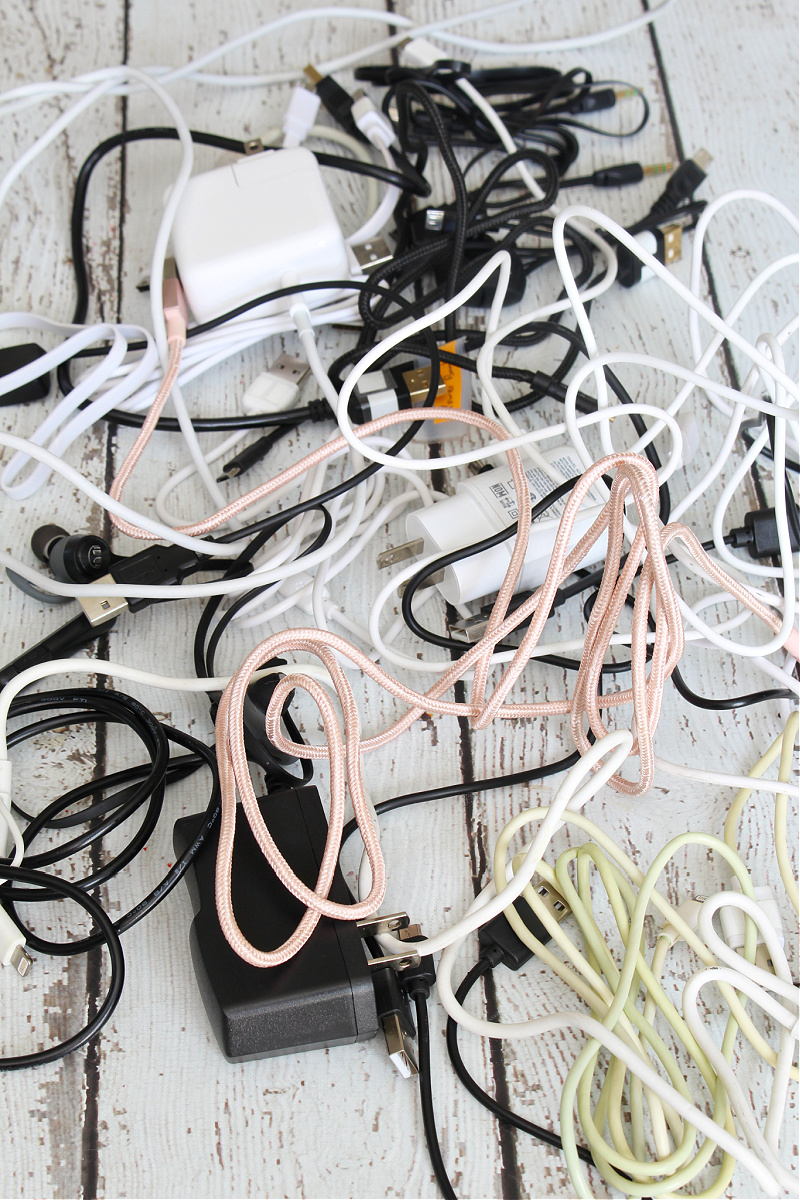
Collect every thing in a single spot.
These tech cords and cables are doubtless unfold out all through your home so go on a bit hunt and collect than all up! Verify purses, desks, bedside tables, your automotive, and another spots that these cords are inclined to accumulate in your house. Get your complete household concerned and see what number of totally different cords you may give you. You could be stunned!
Detangle and type.
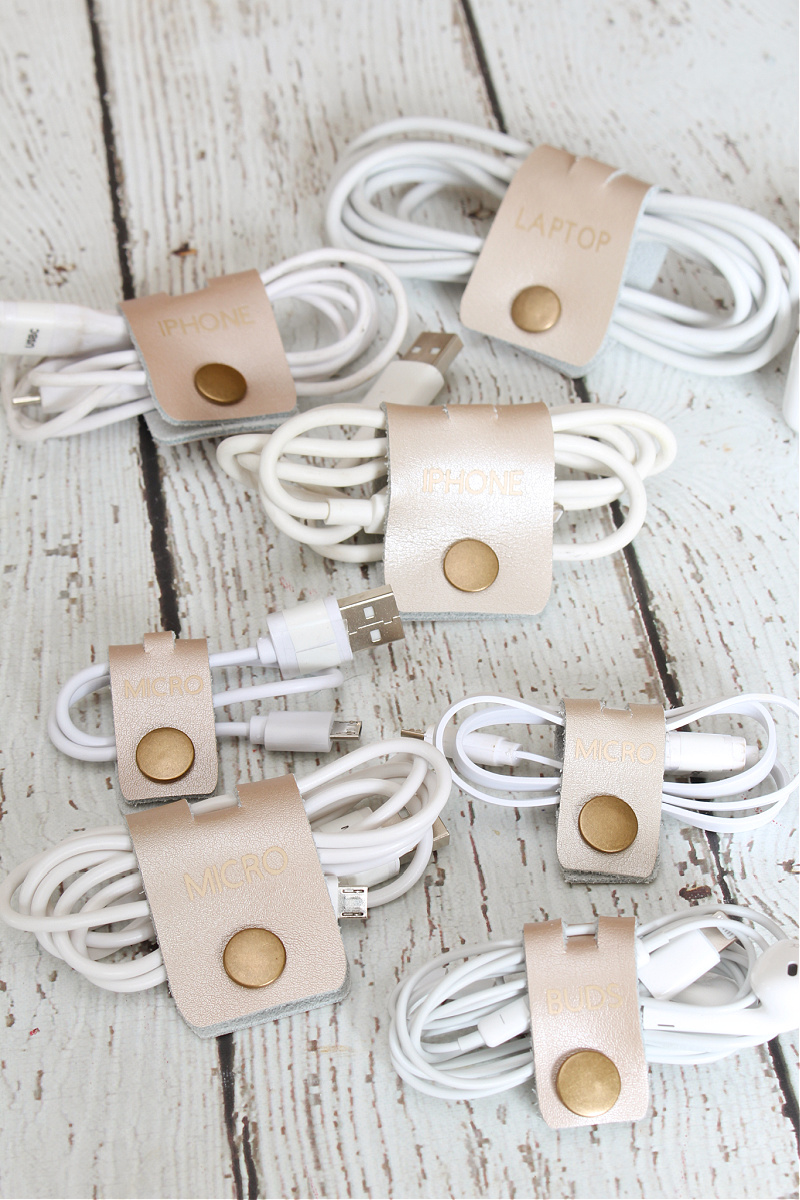
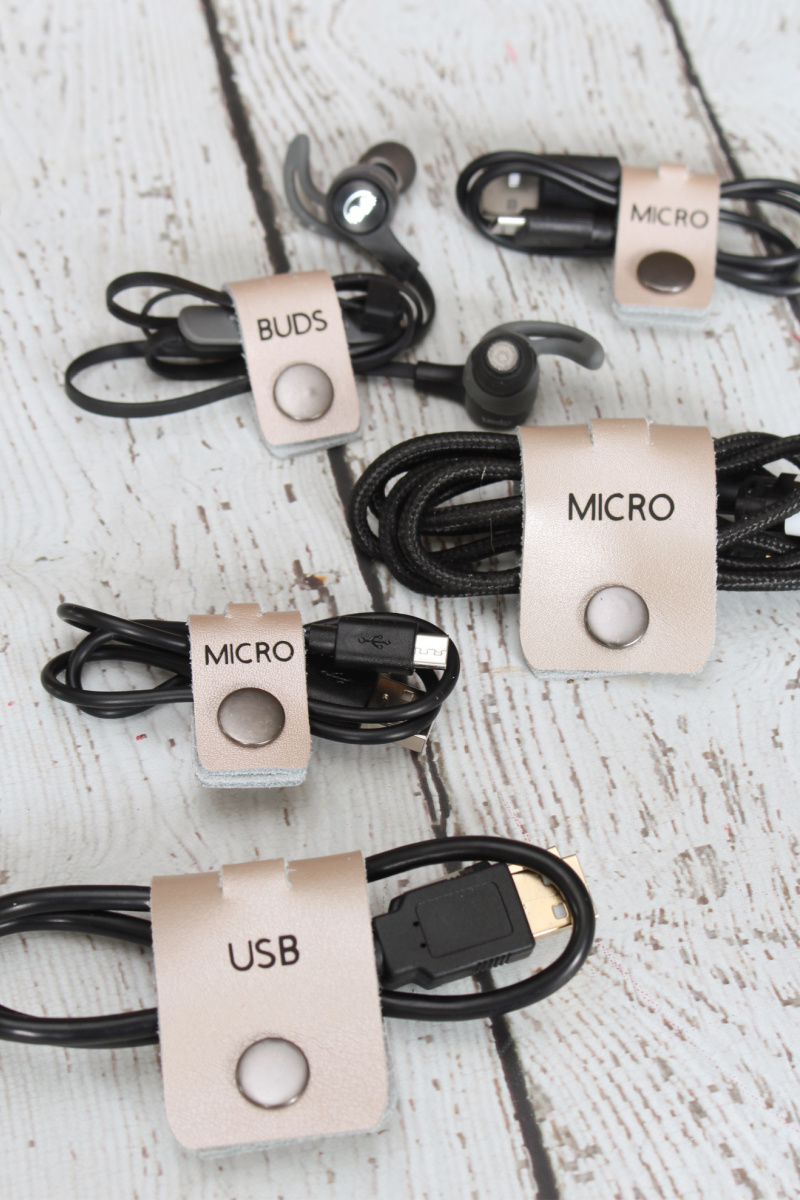
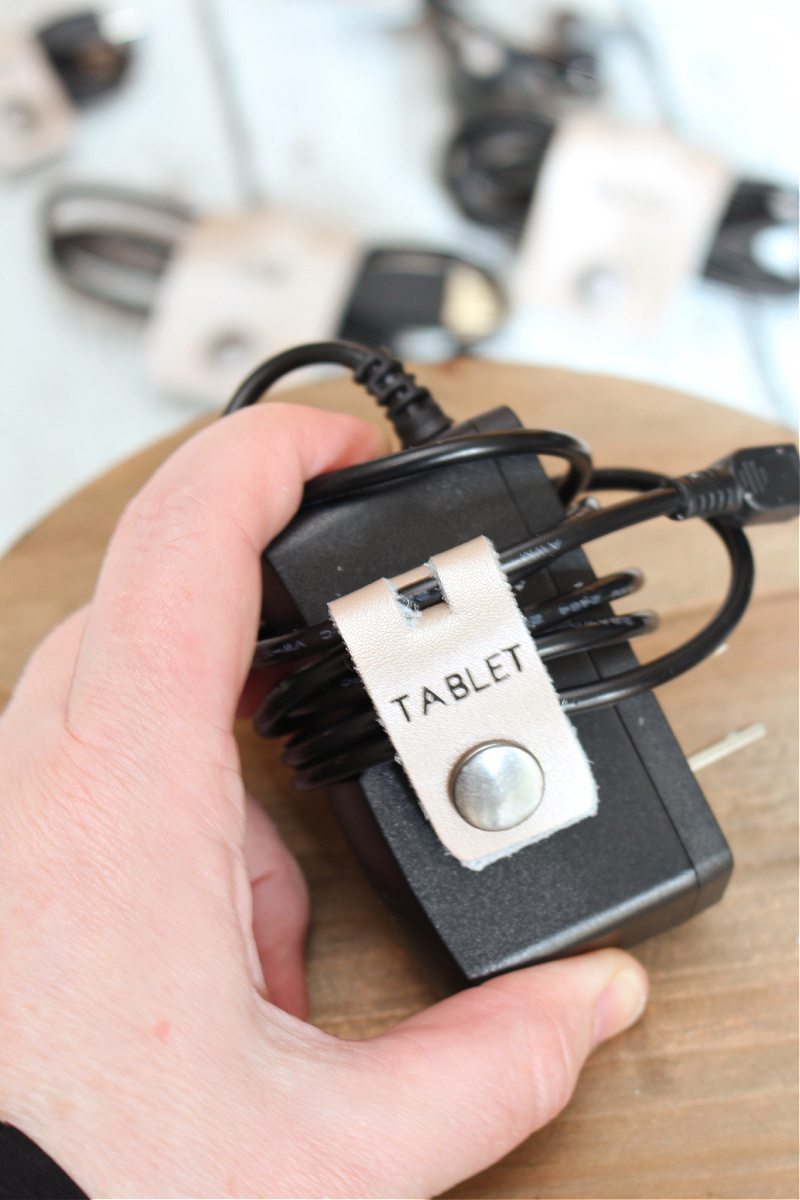
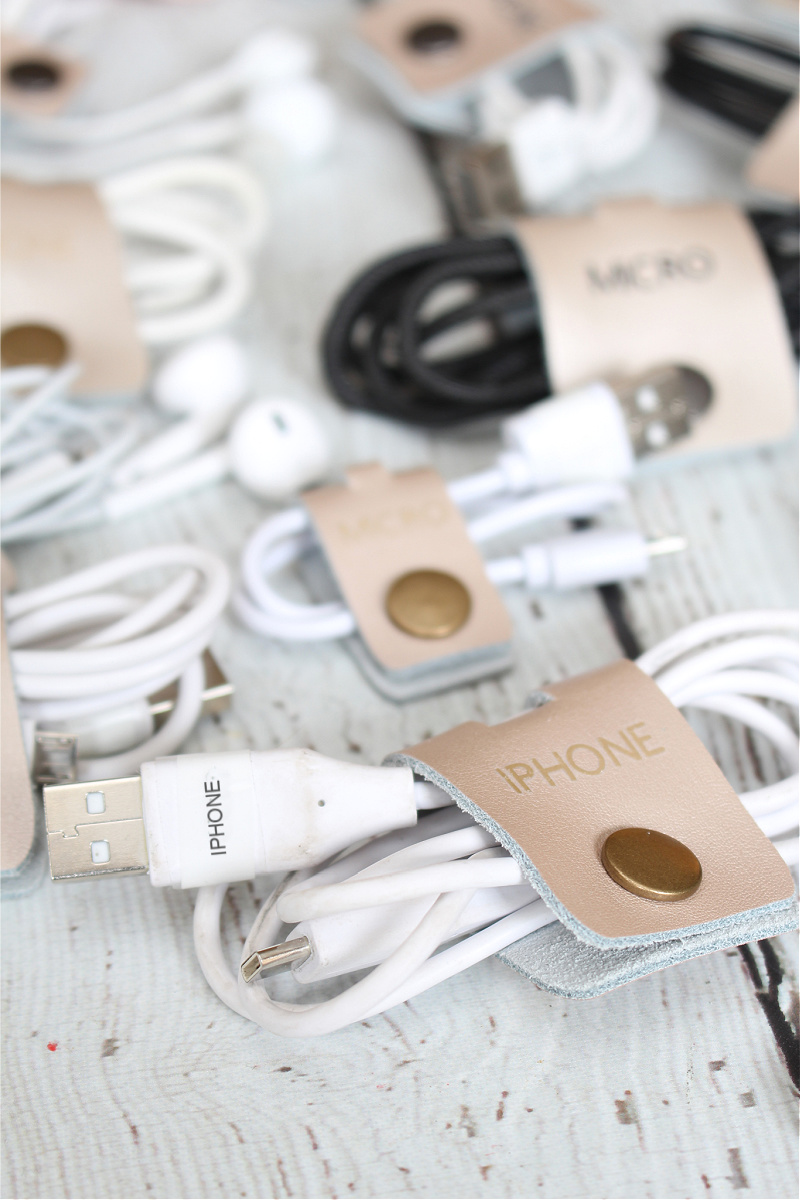
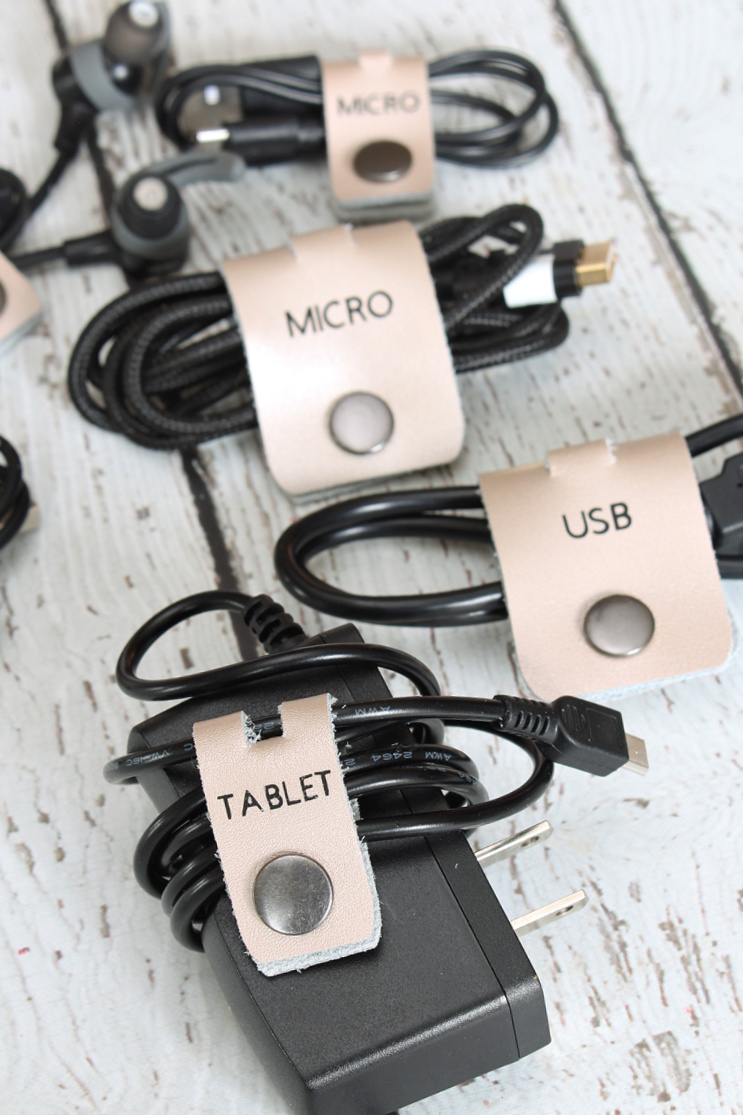
Detangle all of these cords and type them into classes reminiscent of iphone cables/chargers, lap high cords, pill cords, Android cables/chargers, micro USB chargers, ear buds, and so on.
Determine what to maintain.
As soon as your entire charging cords are sorted, make that they’re all in good working order. Discard any which can be broken. Toss {or donate} cords that you just not want or these that you’ve got an extra variety of. I couldn’t consider what number of micro cables we had!
Ensure you know what the entire cords are used for and that you just nonetheless have the gadgets that they go together with. In case you have any “thriller” cables that you just’re undecided should you’ll want, retailer them away for a chosen period of time. In the event that they’re not used inside that period of time, likelihood is you may safely discard them.
Give you a corporation plan.
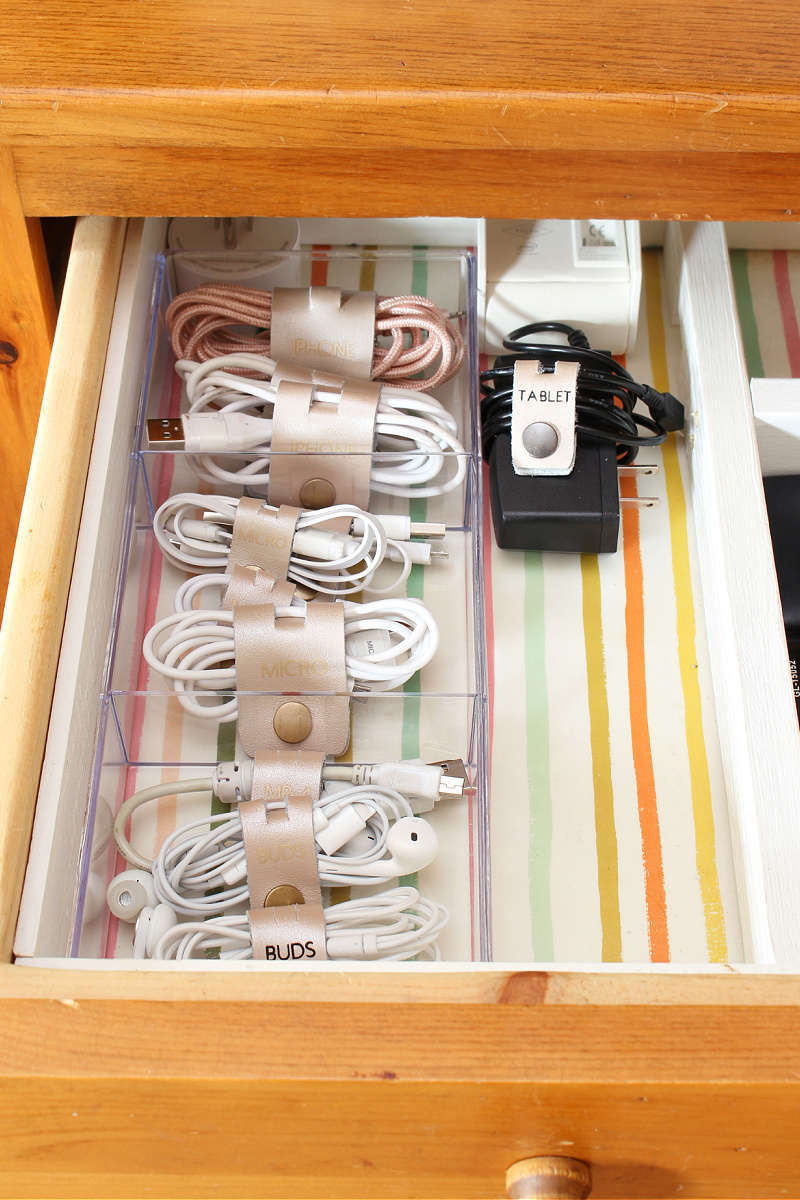
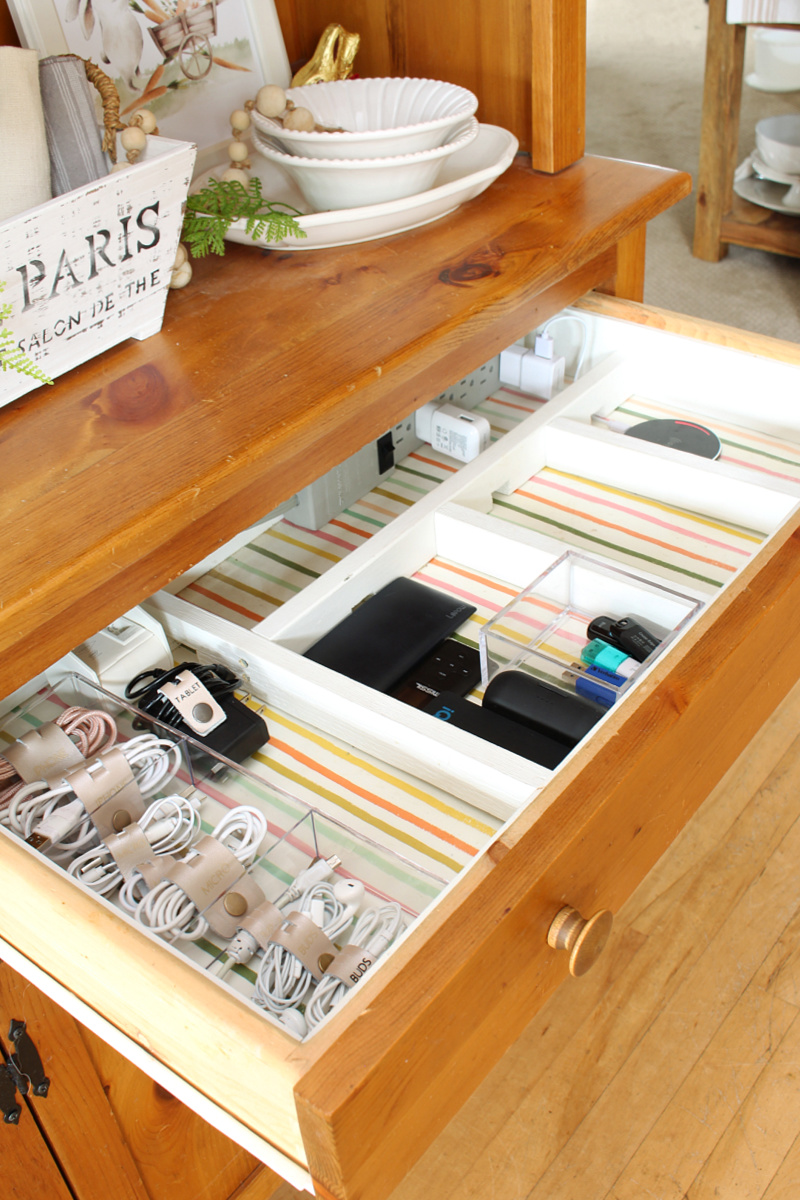
Now that you understand how many cords you could have and must retailer, it’s time to give you a corporation plan. Relying on the variety of cords you could have, it’s possible you’ll wish to have a central storage place for further cords or common cords that the entire household might use. As well as, you can maintain a small wire storage in numerous rooms relying in your wants and the place you are inclined to cost your gadgets. That is our foremost wire storage space the place we maintain nearly all of our cords and chargers.
DIY Cord Organizer
I’ve tried plenty of totally different wire wraps over time, however I believe this DIY wire organizer that I made with my Cricut is my favourite one but. I simply takes as couple of minutes to make, however will prevent hours of frustration!
Supplies
If you wish to customise your wire organizers, additionally, you will want:
- On a regular basis Iron-on vinyl. I used metallic gold for extra of a tone-on-tone refined labelling for a few of the wire organizers and black for a darker label.
- EasyPress. I used my 9×9 EasyPress for this challenge however the EasyPress Mini would work nice for this.
- EasyPress mat
- parchment paper
- weeding device
- scissors
To Make
STEP 1: Customise your design in Cricut Design Area.
Open the DIY wire organizer reduce file in Cricut Design Area. In the event you’d like to regulate the scale you may unlock it and alter the size and/or width to fulfill you particular wants. In the event you don’t want as many wire organizers, simply delete those you don’t need. Change the textual content to no matter names or labels you want to. You possibly can at all times alter the font and font dimension if you want as effectively. In the event you don’t wish to customise your wire organizers, simply delete the textual content and go to step 3.
STEP 2: Lower the Iron-On Supplies.
When you’re comfortable along with your design, click on “make it” and observe the prompts on the display screen. You’ll want to mirror the photographs earlier than chopping.
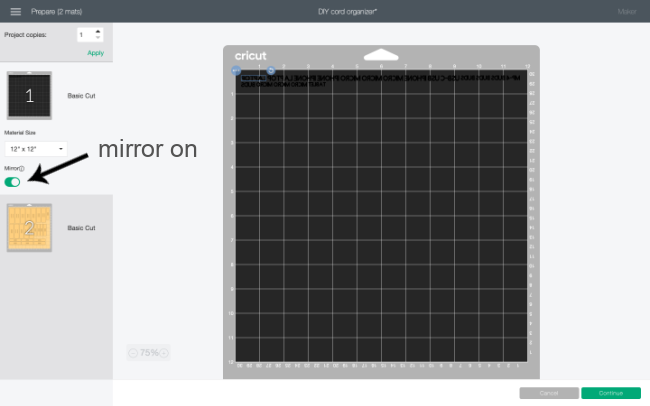
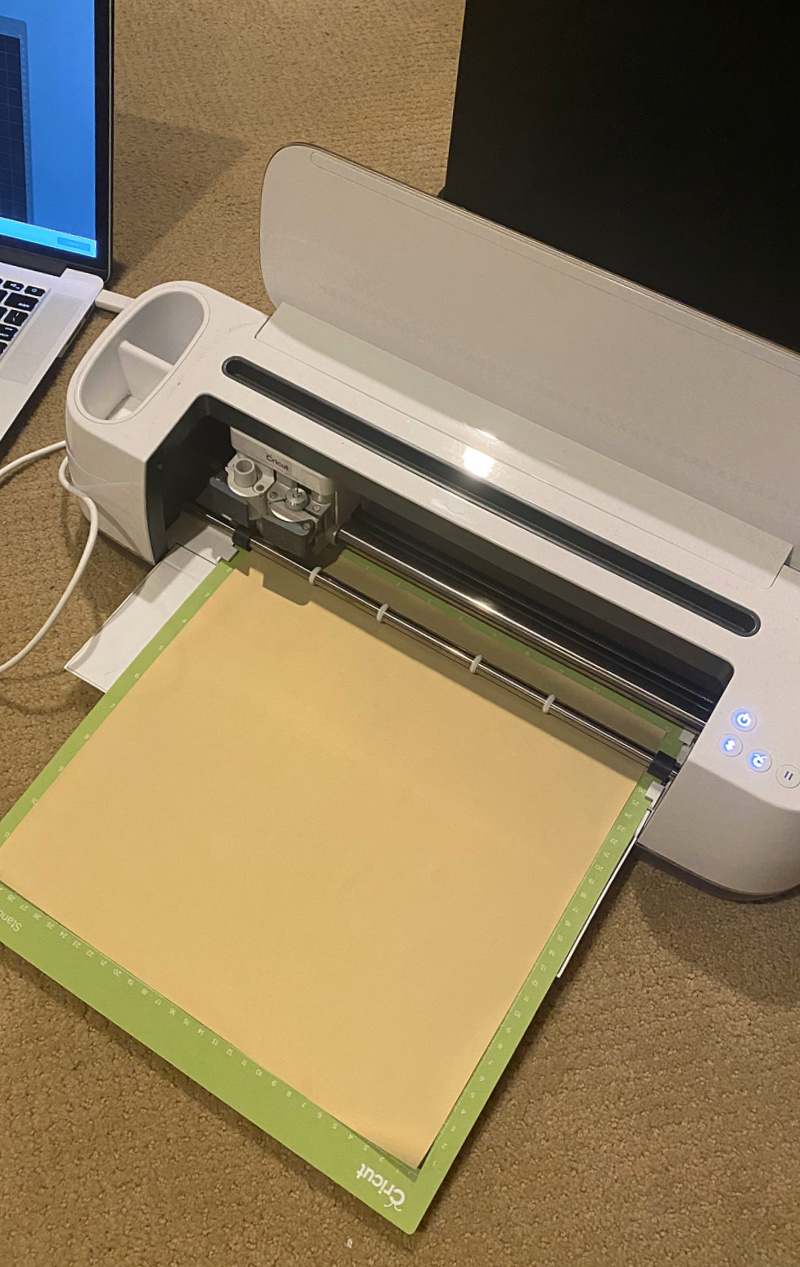
Choose your iron-on materials from the “Browse All Supplies” and be certain that the premium fine-point blade is loaded into your Cricut. Place the iron-on sheet face down {shiny aspect down} onto the inexperienced commonplace grip mat and cargo it into the Cricut and hit the reduce button.
STEP 3: Lower the Leather-based.
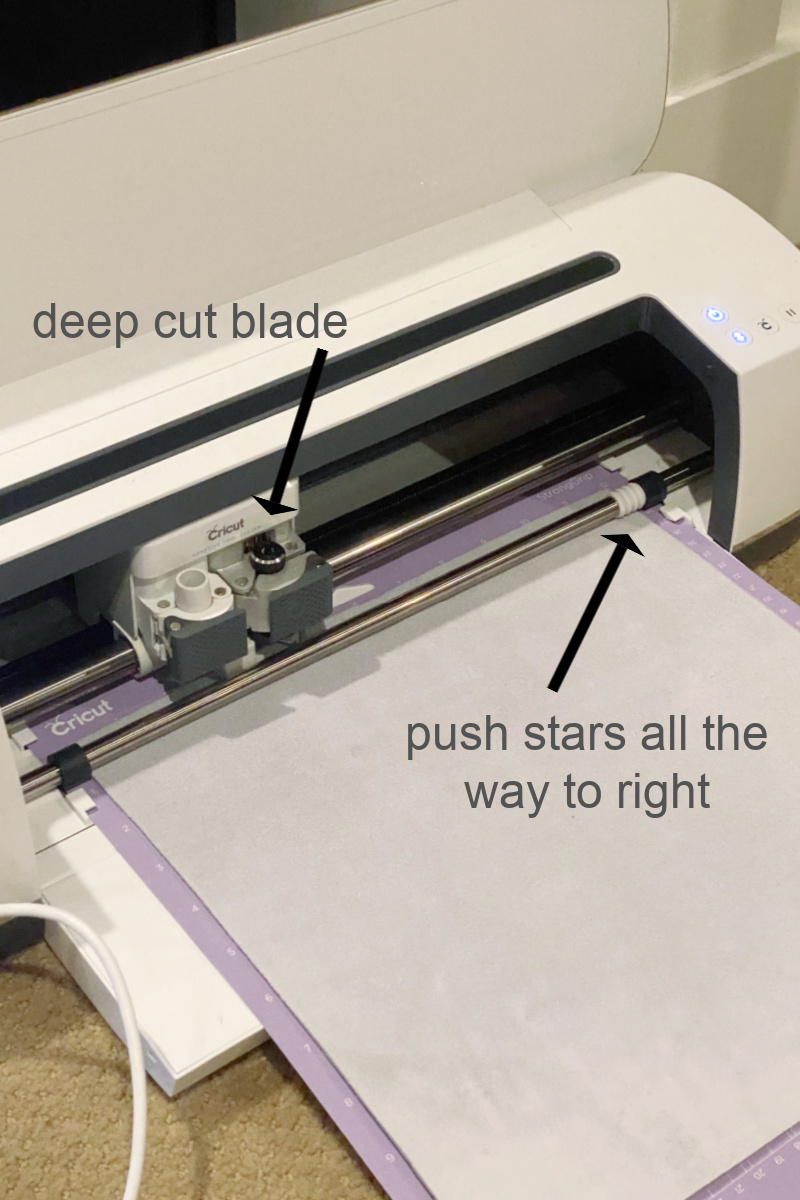
When you’ve reduce the iron-on supplies, it’s time to chop that leather-based! When prompted, choose Metallic Leather-based from the “Browse All Supplies” choice. You’ll then must load the Deep-Level Blade {black housing} into the chopping machine. {NOTE: In the event you want directions on the right way to change the blade click on HERE} Slide the small white “stars” on the Cricut curler all the best way over to the proper in order that they don’t depart any indentations in your leather-based materials.
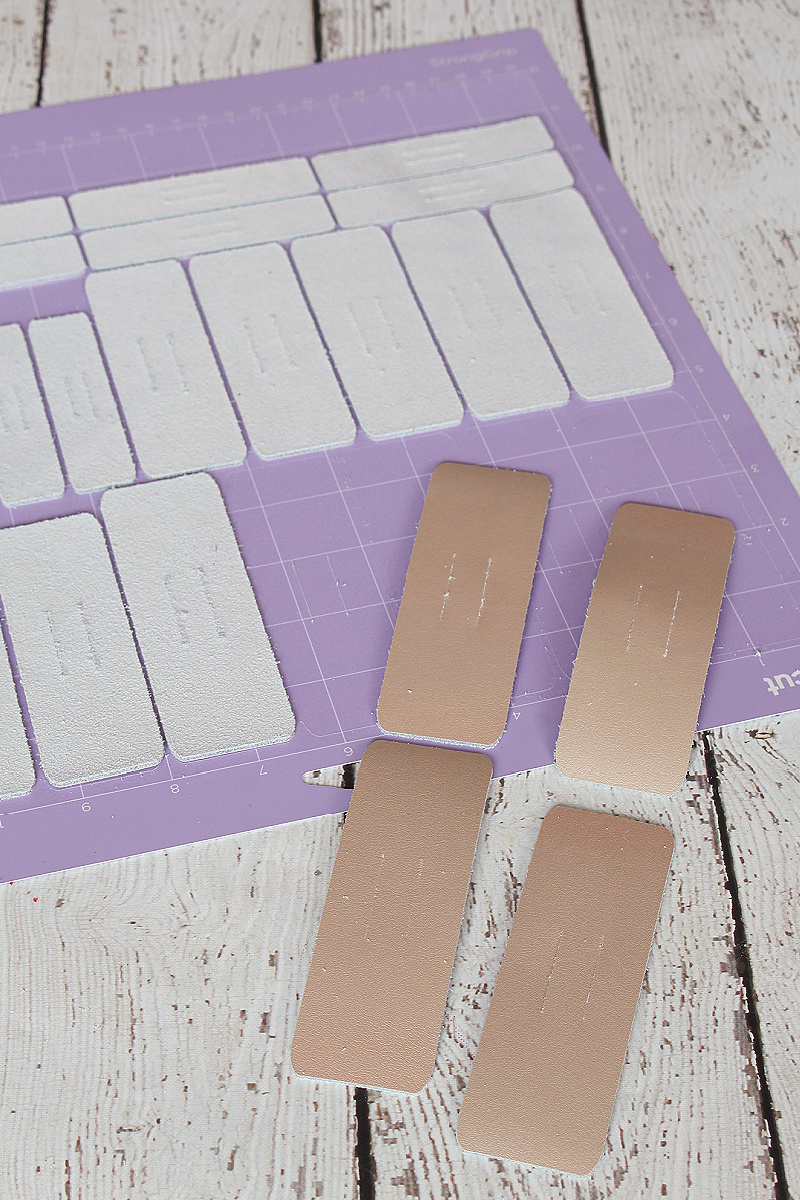
Adhere the leather-based face down {clean aspect down} onto the robust grip {purple} chopping mat. It’s necessary that it’s adhered fairly effectively so it doesn’t slip round throughout chopping. In case your mat is older and also you want a bit further adherence, roll over the leather-based with a brayer or place masking tape across the edges of the leather-based to carry it in place. Load the mat into your chopping machine and observe the on-screen prompts to finish chopping.
Step 4: Weed the iron-on.
Trim down the surplus vinyl away from the phrases so it’s simpler to work with. Weed away the detrimental area utilizing the weeding device. You need to be left with the phrases caught on the clear liner. Utilizing scissors, fastidiously separate the phrases.
STEP 5: Iron-on the labels.
Pre-heat the EasyPress to 280F {140C}. {NOTE: I at all times check with the Cricut warmth information after I’m utilizing iron-on supplies. Since there wasn’t a leather-based choice listed, I used the identical settings because the fake leather-based and examined it first on a scrap piece of leather-based}. Place the leather-based strips on the Cricut EasyPress mat and canopy with parchment paper to guard the leather-based. To hurry up the method, you are able to do a couple of wire organizers at a time.
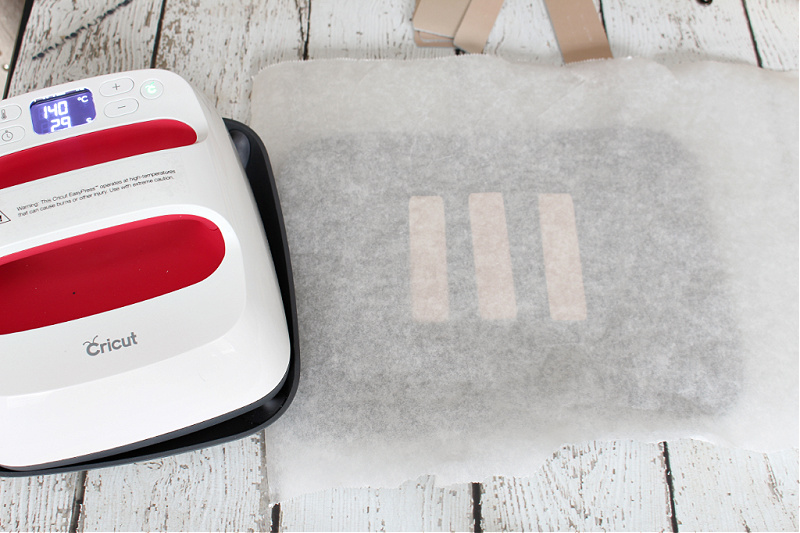
Frivolously press the Straightforward Press over the parchment/leather-based for five seconds to preheat the leather-based. Take away the parchment and place the labels the place you’d them on the wire wraps. Get better the leather-based with the parchment and press the EasyPress in place for 30 seconds. Permit to chill barely and punctiliously take away the clear backing. Repeat for your entire wire organizers.
STEP 6: Add the snap fasteners.
Collect up the provides wanted to connect the snaps. You’ll want a strong floor to work on – both a self-healing mat or an previous chopping board work greatest.
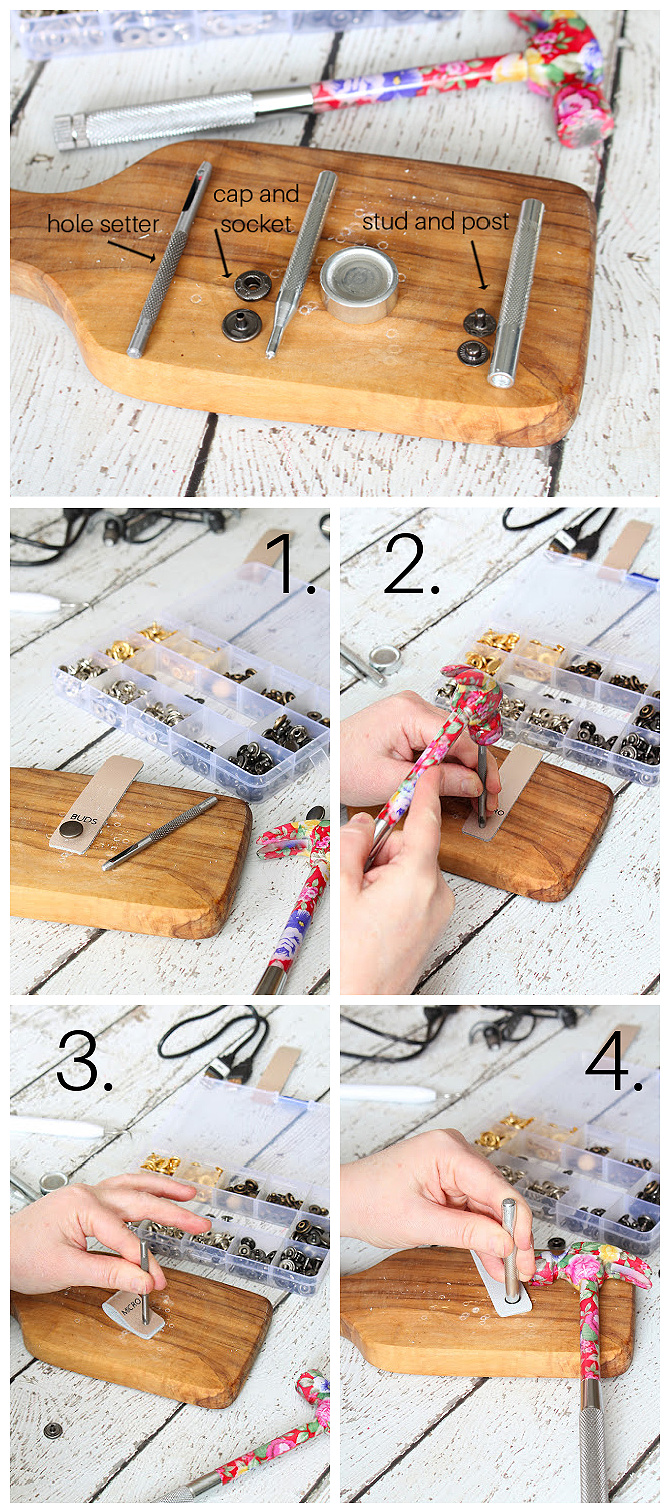
- Take one of many caps from the snaps and press it into the wire wrap the place you need it to sit down. This can depart a mark so that you’ll know precisely the place to place the outlet.
- Utilizing the outlet setter and a hammer, make a gap for one aspect of the snap.
- After you have the primary gap, fold the organizer in half and place the outlet setter by way of the primary gap to mark the second gap.
- Add the cap and socket to the entrance aspect of the wire organizer within the following order: cap, leather-based, socket. To keep away from denting the cap, place the cap within the silver base earlier than hammering. Place the smaller nostril head device into the socket and hammer in place.
- Add the stud and publish to the again aspect of the wire organizer. Use the broader primarily based device to hammer them collectively.
STEP 7: Wrap up your cords.
Now’s one of the best half – it’s time to wrap your cords! My favourite factor about these wire organizers is that you would be able to slip the wire by way of the slits so the organizer will at all times keep on the wire – even when unwrapped.
You may as well use the wraps to shorten up your laptop computer cords so that you don’t have further wire falling down from behind your desk. Simply plug it in and wrap up any extra.
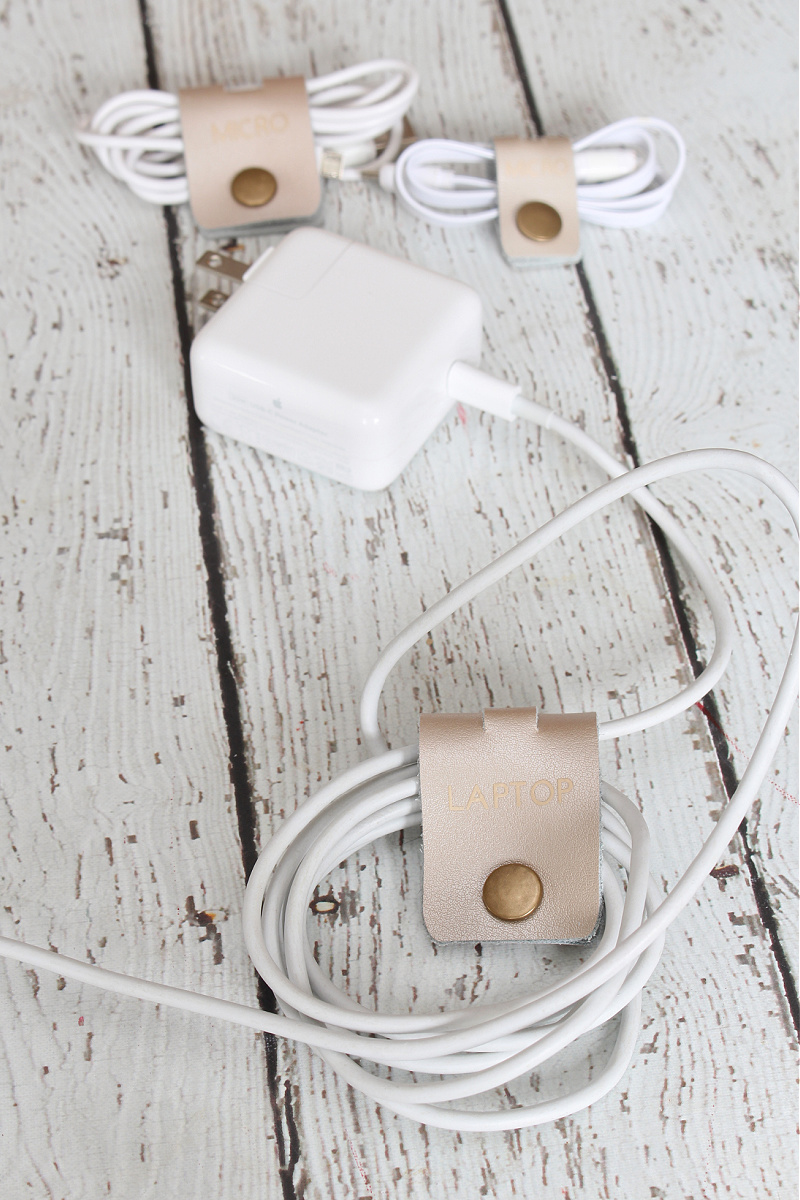
For the cords with bigger plugs, you may wrap the wire across the plug should you desire after which simply safe the wire with the smaller wire organizer.
In the event you don’t wish to take the time so as to add the labels to the wire organizers, you can use a labeller to only add a label on to the wire itself.
Tricks to Lower Cricut Real Leather-based
You possibly can reduce Cricut model real and metallic leather-based on each the Cricut Maker or Cricut Discover Air. I’ve had my Maker for greater than 2 years now and might’t consider that it took me this lengthy to check out the leather-based! I’m at all times nervous to strive new supplies, but it surely was really easy. Listed below are a couple of suggestions for getting one of the best cuts out of the Cricut leather-based supplies…
- Place the leather-based face down onto the chopping mat. This can assist to protect your mat as this aspect has much less “fuzz” on it.
- Because you’re inserting your leather-based face aspect down, you’ll need to reflect your picture if it’s not symmetrical {i.e. letters or another design that isn’t symmetrical should you flip it over entrance to again}.
- Use the purple {robust grip} chopping mat. If the leather-based continues to be not sticking effectively, roll a brayer {or rolling pin} over the leather-based to stick.
- Transfer the star wheels all the best way to the proper to keep away from leaving any indentations within the leather-based.
- You will have to make use of the deep reduce blade for chopping real leather-based. This is available in a black housing. {NOTE: In the event you don’t wish to buy a further chopping blade you should use fake leather-based with the high quality level blade that comes with the Maker or Discover}
- Verify the fabric to make sure that it’s reduce all through earlier than unloading the mat.
- If you’re utilizing non-Cricut model leathers reminiscent of garment leather-based or tooling leather-based you’ll need to make use of a knife blade. Yow will discover the precise suggestions for these leathers HERE.
I hope you discover these wire organizers as useful as I do. I’d like to see your creations! In case you have any questions, simply let me know.
Extra Group Initiatives
For extra group concepts, try these posts…
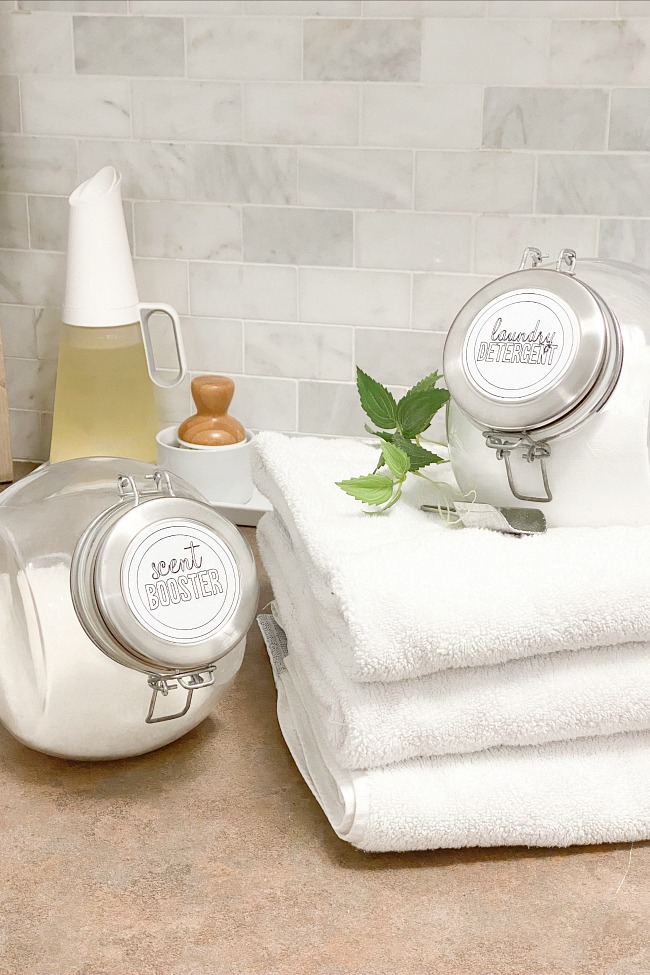
DIY Laundry Labels
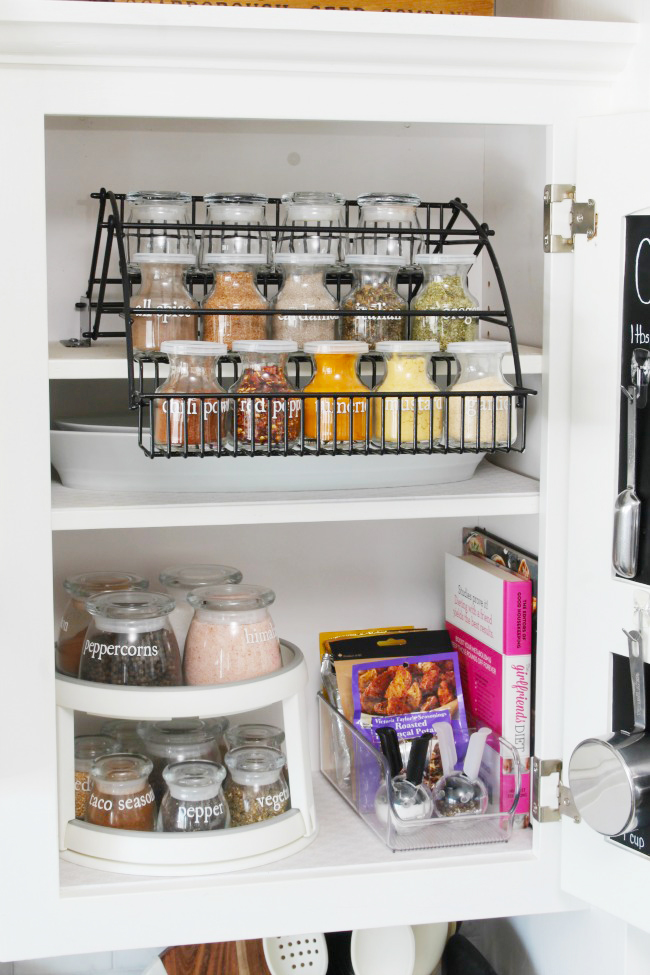
Spice Group Concepts
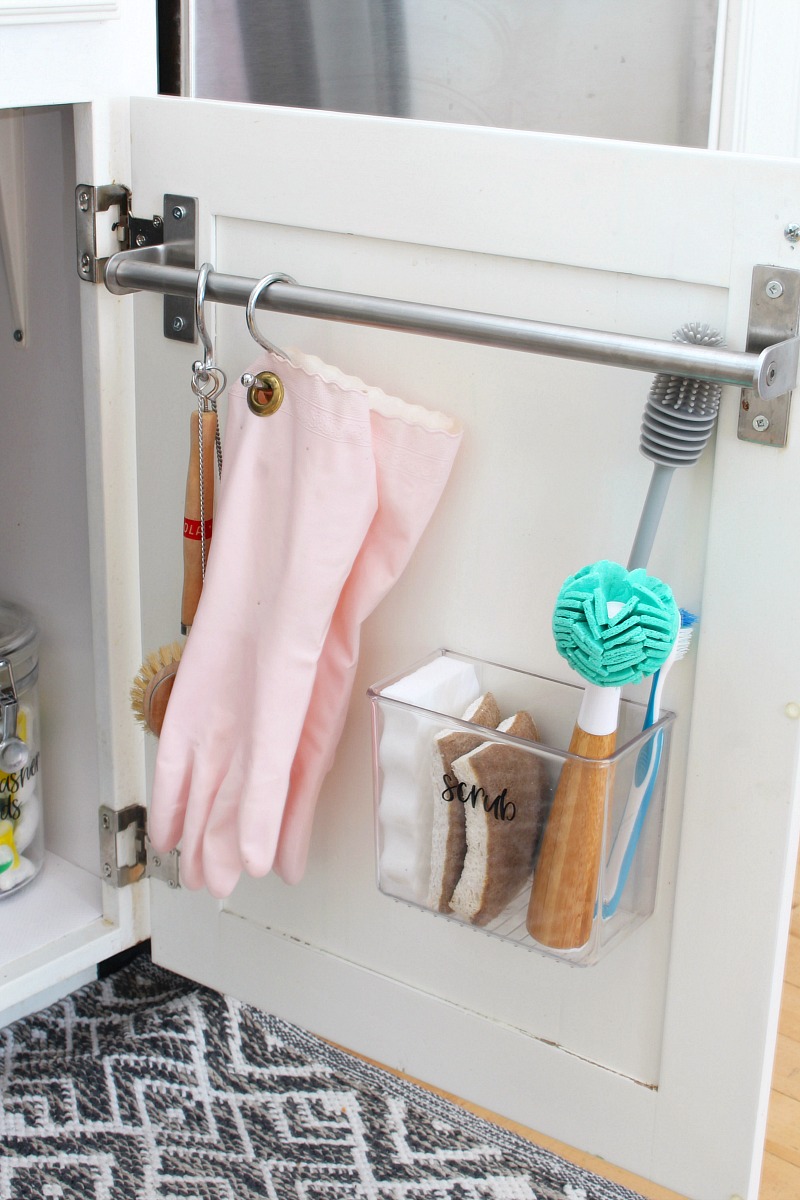
Below Kitchen Sink Group