
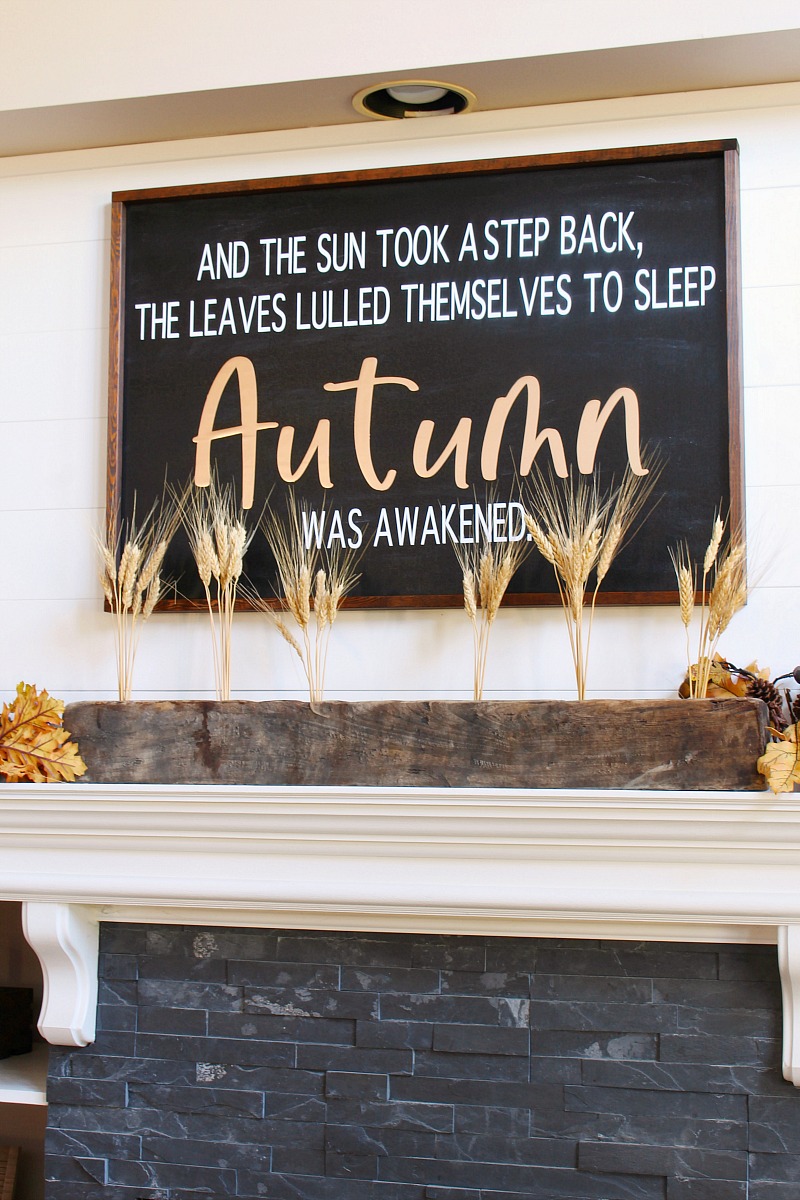
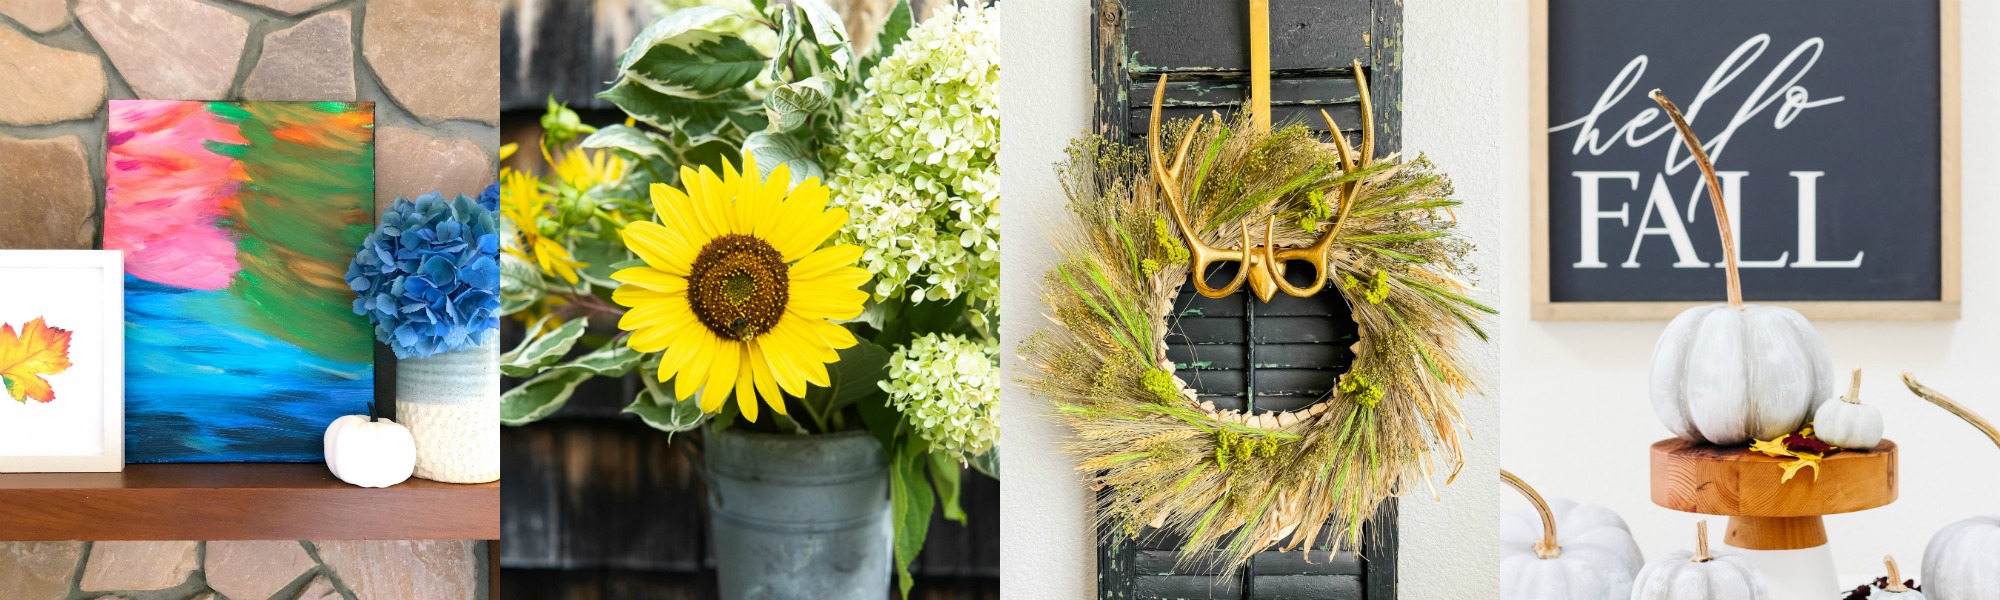
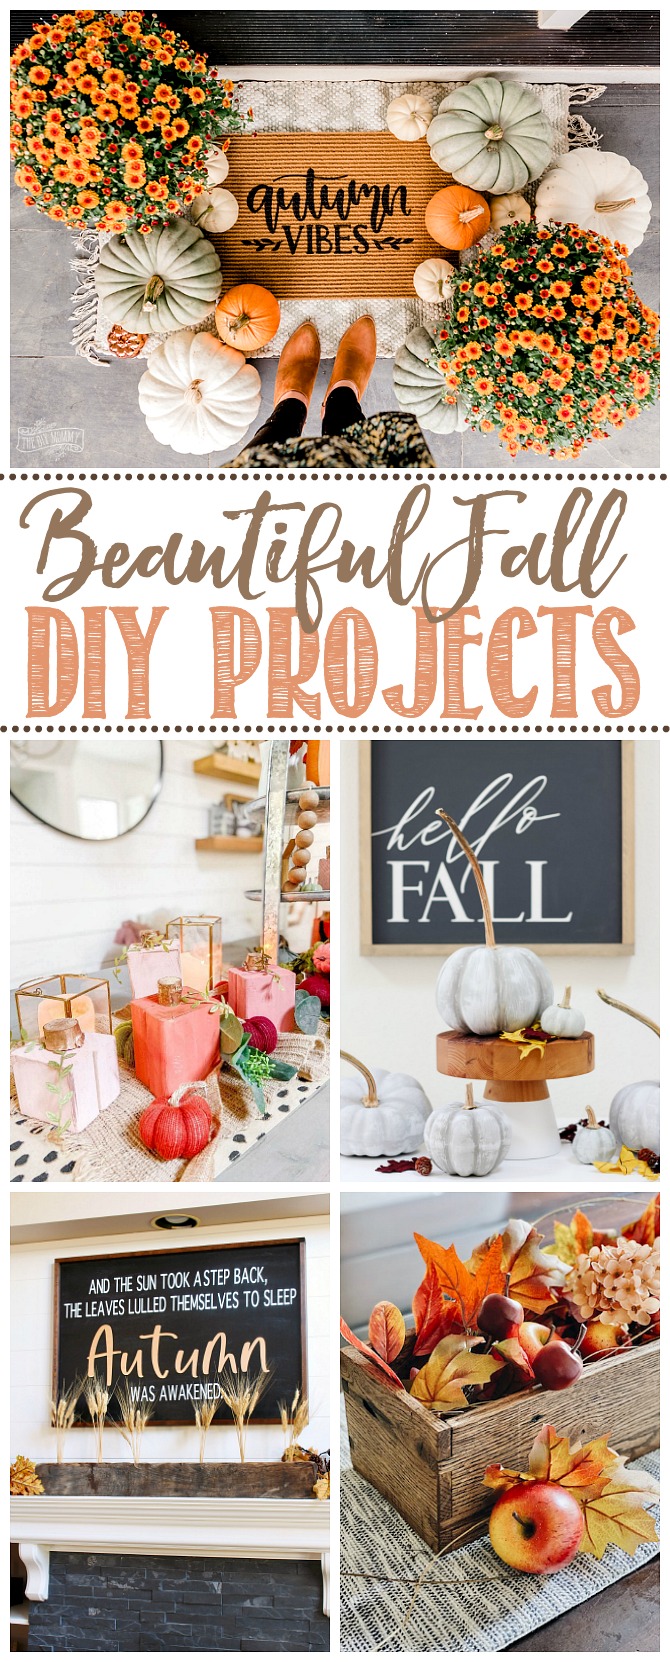
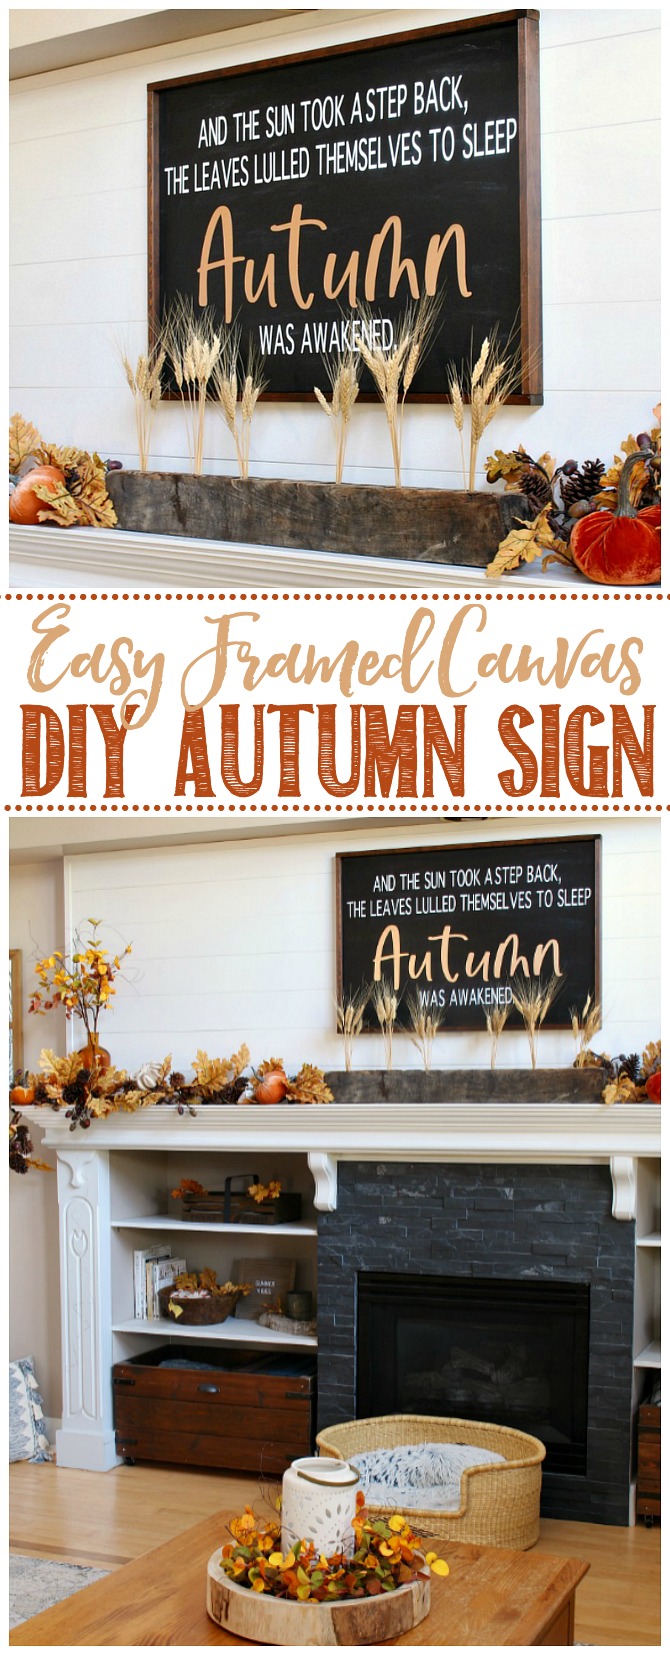
Add a fairly assertion piece to your seasonal decor with this simple DIY fall signal. Customise it to any colours and design you desire to!
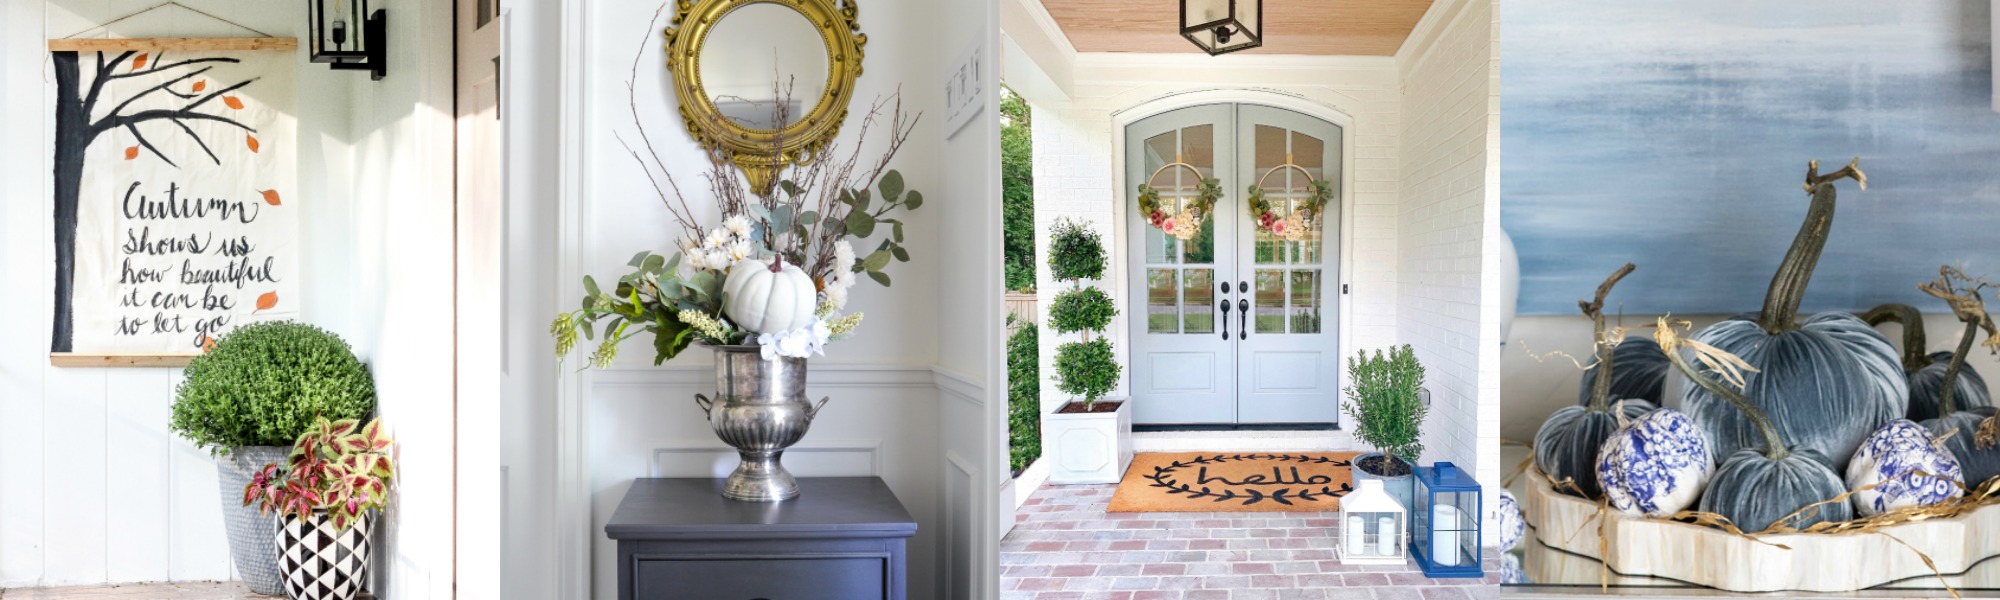
Seasonal Simplicity Collection
Welcome again to Week 2 of the Seasonal Simplicity Collection! Every week 20+ bloggers are sharing their greatest fall concepts – from fall crafts to seasonal recipes and fall decor! Final week we received began with our favourite fall recipes and this week is all about fall DIY and craft tasks! You’ll find all the lovely concepts on the finish of the put up, so be sure you verify them out earlier than you go!

This put up incorporates affiliate hyperlinks. Because of this I could make a small fee for free of charge to you off gadgets that you just buy immediately by means of the hyperlinks offered. Thanks a lot in your assist!
DIY Fall Sign
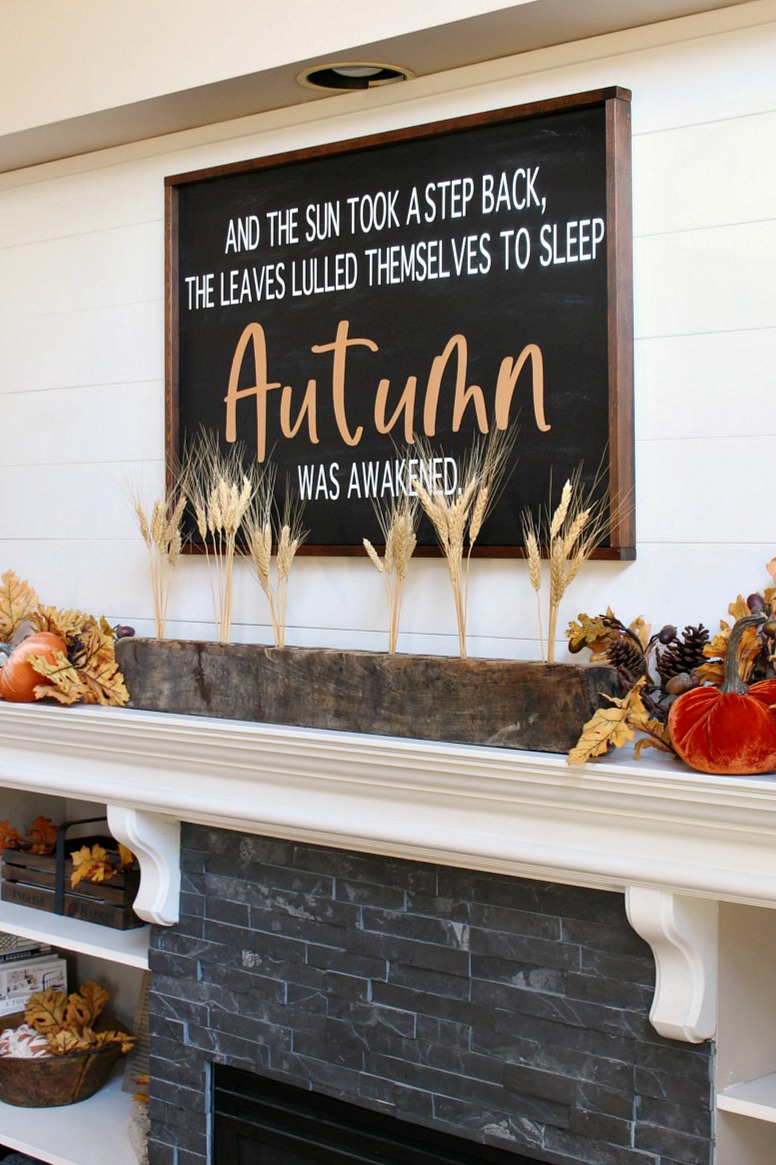
A giant assertion piece could make such an affect in your seasonal decor. Sadly, they may also be costly and it may be arduous to search out precisely what you’re on the lookout for. That’s why it’s all the time superior if you happen to can create your individual! This DIY fall signal is created from a canvas with easy 1x2s because the body. You’ll find the canvases in quite a lot of completely different sizes and the design and colours may be switched up for any type, theme, or shade scheme.
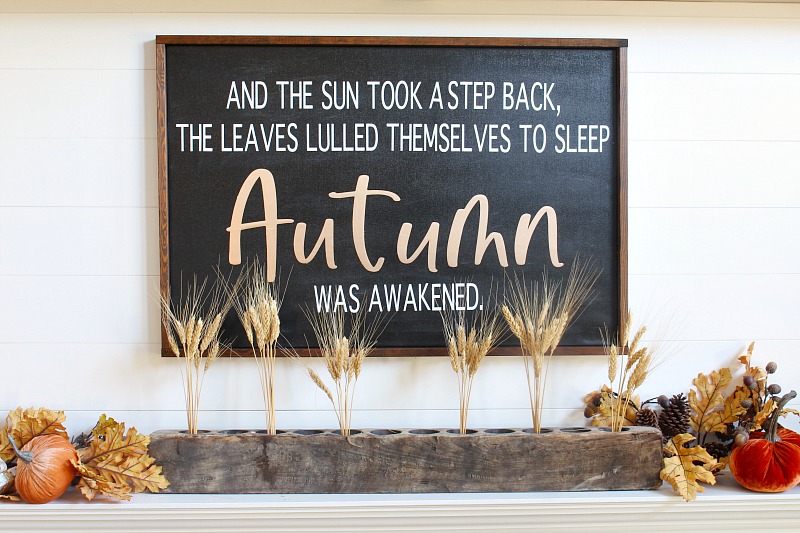
DIY Canvas Sign Tutorial
There are a variety of various methods which you could make a DIY fall signal much like this one. I’ll stroll you thru the step-by-step of how I did mine and then discuss on the finish about just a few various strategies that you would do in order for you a barely completely different look. when you’ve got any questions, simply let me know!
Supplies
- canvas {mine is 24×36}. These are sometimes on sale at craft shops or an effective way to make use of your coupons!
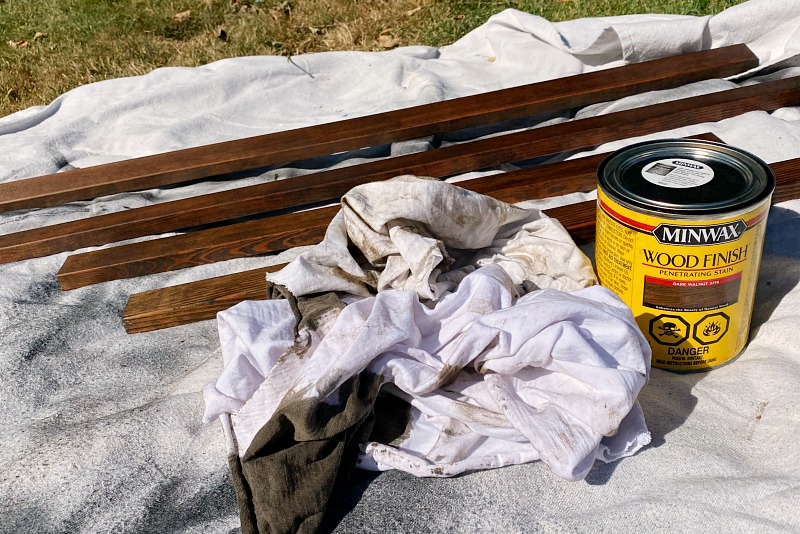
- 1×2 boards for the body. A softer wooden will probably be simpler to connect {I discovered this the arduous manner!}
- stain {I used a darkish walnut stain}
- paint {I used black spray paint on mine however any paint will do}
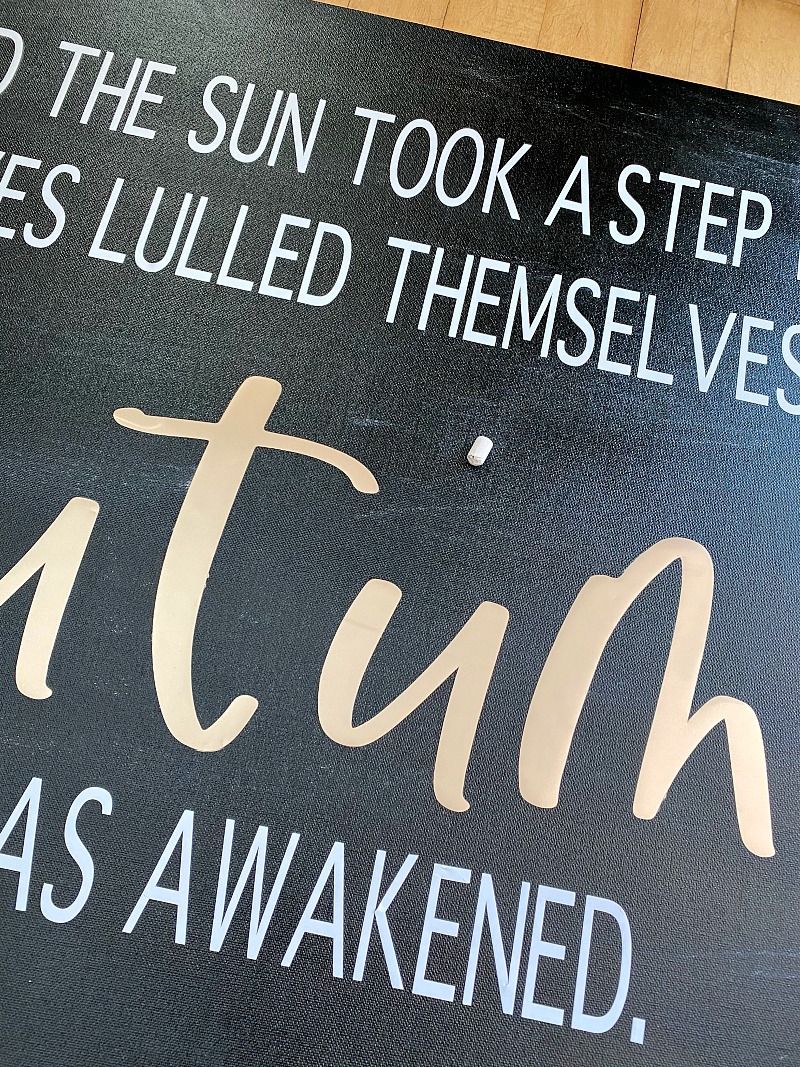
- vinyl {I used white vinyl for the smaller phrases with matte adhesive gold foil for Autumn}
- tape measure
- degree
- slicing machine {I used my Cricut Maker and Cricut Pleasure}
- nail compressor or wooden glue/clamps
NOTE: For those who don’t have a slicing machine you may make your individual stencils to make use of utilizing this print and lower methodology or this switch methodology.
Instructions
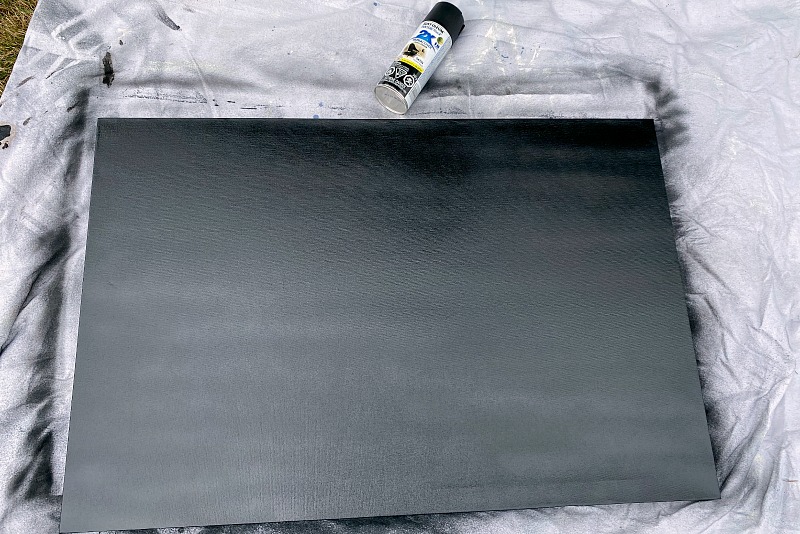
Paint the canvas.
I simply used some black spray paint on mine because it’s the quickest utility, however any paint ought to work.
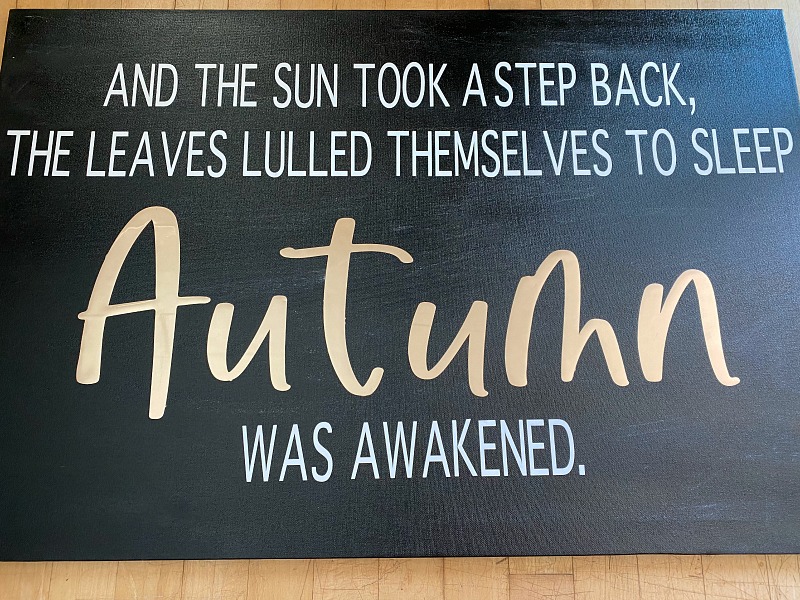
Give you your design.
I discovered a quote that I beloved and then performed round with the design in Cricut Design area. For those who don’t have a Cricut or different slicing machine, you are able to do a piece up of your design in Photoshop or different picture editor. I used Thornburi and Pumpkin Harvest for my fonts. Verify to ensure that the font dimension works with the dimensions of your canvas. You might need to perform a little little bit of math! 😉
Reduce and adhere your design.
I used my Cricut Maker to do the larger Autumn letters and my Cricut Pleasure to do the smaller letters {you may learn extra about Cricut Pleasure HERE}. This was my first time working with the gold foil and I beloved it! Utilizing vinyl switch paper, apply the design to your canvas. It’s useful to have a degree and a tape measure available for this so you may get the whole lot centred and levelled. I like to put the whole lot out earlier than I begin adhering it.
Put together the body.
Reduce your 1x2s to suit your canvas. To maintain issues easy, I simply framed it by butting up the items collectively somewhat than doing 45 diploma cuts. First, lower 2 items the identical size because the width {brief facet} of the canvas. For the two size items {lengthy sides of the canvas}, you’ll need to chop them the size of your canvas plus the thickness of the wooden x 2 {so your size piece will cowl the width items on every finish}. Simply do not forget that canvases are usually not all the time completely sq., so double verify your measurements up alongside the facet of the canvas simply to make certain. Sand if wanted.
Stain the 1x2s. I used a darkish walnut stain to go along with the opposite wooden tones in our household room however I feel a lighter stain could be good in opposition to the black too. I discover it best to use the stain with some previous rags and mainly simply wipe it on and then wipe it off. Let dry. You’ll be able to sand these down if you need a extra distressed look or go away as is.
Connect the body.
You probably have a nail gun and compressor, this would be the easiest way to connect the body. You probably have a softer wooden in your body, you may simply use the nail gun and connect the body on to the canvas. I’ve carried out this efficiently many instances previously, however the wooden I used for this challenge was a actually arduous wooden {I feel they have been oak}. After just a few failed makes an attempt, we ended up utilizing a really small drill bit to pre-drill the holes and then used the nail compressor. Success!!
Begin by attaching the 2 brief sides of the body and then add the longer items.For those who don’t have a nail gun and compressor, you need to use wooden glue and clamps to connect the body. Up to now, I’ve additionally used wooden screws and drilled in from the inside of the canvas to connect the body as effectively. This works when you’ve got the thicker 2 inch canvases however the one I used to be utilizing was only a 1 inch.
Misery your canvas.
This step is completely elective, however I discovered the black spray paint was just a bit too “excellent” and I needed to misery issues a bit. I simply used some chalk for this and rolled it over the canvas utilizing the facet of the chalk. I then used my hand to mix all of it in till I received the look I needed. This doesn’t actually present up within the pictures effectively, however you may see it higher in numerous mild. I feel it simply lightens up the look a bit.
Alternatively, you would do a lightweight distressing with sandpaper over the canvas for the same look. If I had considered it firstly {earlier than I utilized the vinyl}, a bit dry brushing with white paint would additionally do the trick.
Various Strategies
There are a variety of various methods which you could obtain an analogous look with the lettering. I selected to simply add the vinyl on to the canvas and not use the vinyl as a stencil. This enables me to easily take away the vinyl if I wish to use the canvas for one more challenge sooner or later. Plus, it’s the best and least messy methodology! 😉 Listed below are just a few various strategies that you would use in order for you a painted or extra rustic look…
- Use the damaging area {the define} out of your vinyl to make use of as a stencil or make your individual DIY stencil. For this methodology you’d paint your background, add the stencil and then paint inside in your lettering.
- Use the constructive area from the vinyl as a stencil. This works greatest if you need your letters to stay the white canvas shade. Simply apply your vinyl design to the canvas earlier than portray. As soon as the vinyl is utilized, paint the background, permit to dry and then fastidiously take away the vinyl.
- Calmly draw out your design on the canvas and then paint it in.
- Use a switch methodology {there are two strategies described relying on whether or not you may be transferring to a lighter or darker floor} and then fill in with paint. For those who’re not nice with a paint brush, paint pens are a a lot simpler various!
I hope this tutorial was useful for you! Bear in mind which you could all the time scale the dimensions down or go away off the body in order for you a faster model. Let me know if you happen to make one!
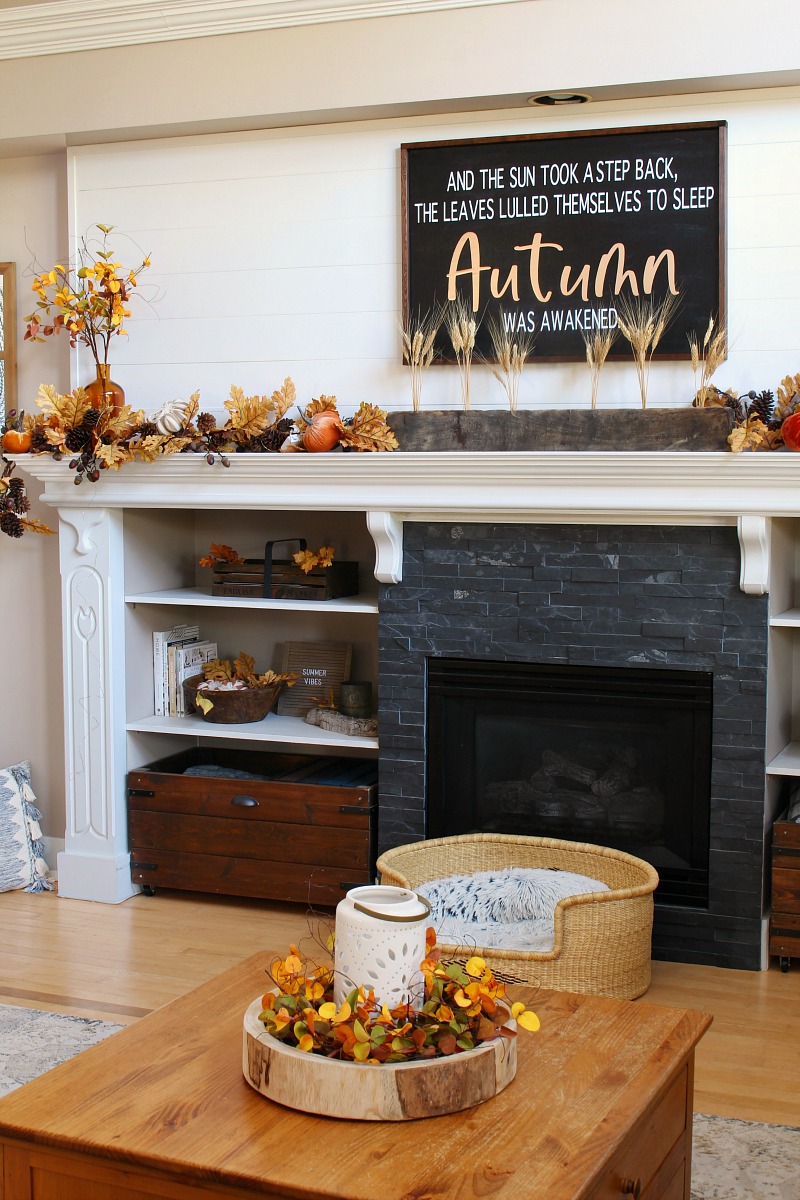
Now to complete off the remainder of the autumn mantel! {Are you able to see the summer season letter board nonetheless on the shelf?} I’ll present you all the particulars subsequent week and our full fall household room residence tour the week after that. Completely happy fall adorning!
Extra Fall DIY Initiatives
For those who’re on the lookout for extra fall DIY and craft tasks, take a look at all of those superb concepts. These ought to hold you busy for some time! 🙂
DIY Fall Acrylic Summary Panorama Portray at The Completely happy Housie
5 Enjoyable Fall Preparations at Discovering Silver Pennies
Tips on how to Make a Dried Floral Wreath on the Tattered Pew
DIY Painted Pumpkins that Look Like Cement at Fashionable Glam
Tips on how to Make a Doormat with a Cricut at The DIY Mommy
DIY Fall Sign at Clean & Scentsible
Scrap Wooden Fall Pumpkins at Tatertots and Jello
Macrame Garland at Life is a Occasion
DIY Summary Artwork Our Greatest Ideas at The Handmade House
Fashionable Fall Lunaria Wreath at That is Simplicite
Painted Mason Jars at Dans le Lakehouse
Fall Macrame Wreath at Place of My Style
Straightforward DIY Fall Shelf Decor at Cherished Bliss
DIY Glitter Pumpkins at Lolly Jane
DIY Rustic Fall Flower Association at Fairly Life within the Suburbs
Tips on how to Make a Handmade Clay Bead Garland at My Candy Savannah
DIY Rustic Wooden Centerpiece Field at She Gave it a Go
Tips on how to Make a Fall Wall Hanging at Cassie Bustamante
Elegant Fall Flower Association at Rambling Renovators
Blush Fall Hoop Wreath Tutorial at Chrissy Marie Weblog
DIY Blue and White Chinoiserie Pumpkins at Jennifer Maune
And if you happen to’re nonetheless on the lookout for extra concepts, listed below are a few of my favourite fall DIY tasks and crafts from earlier years…
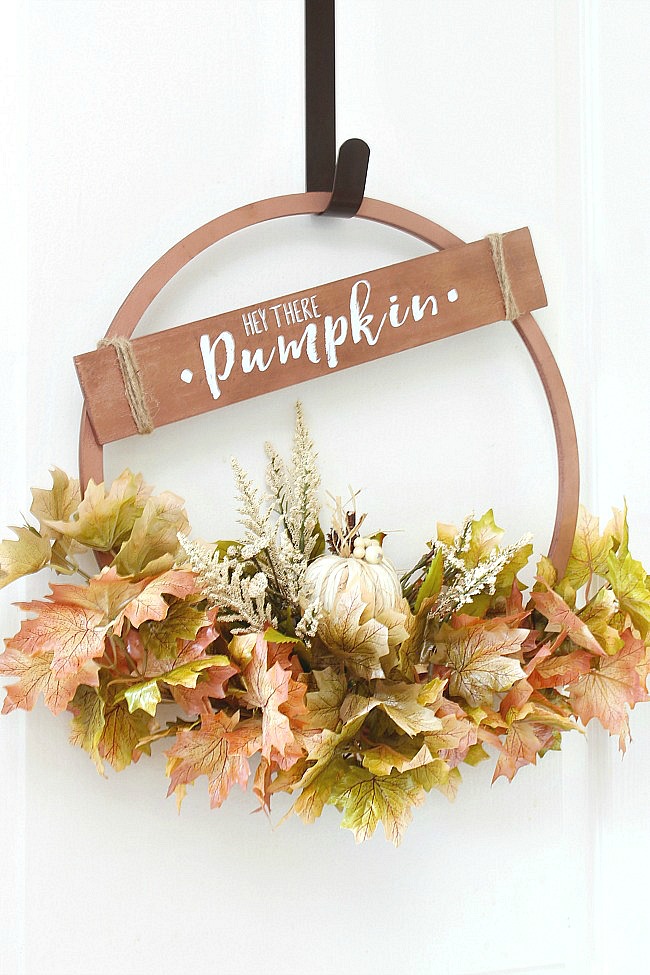
DIY Copper Fall Hoop Wreath
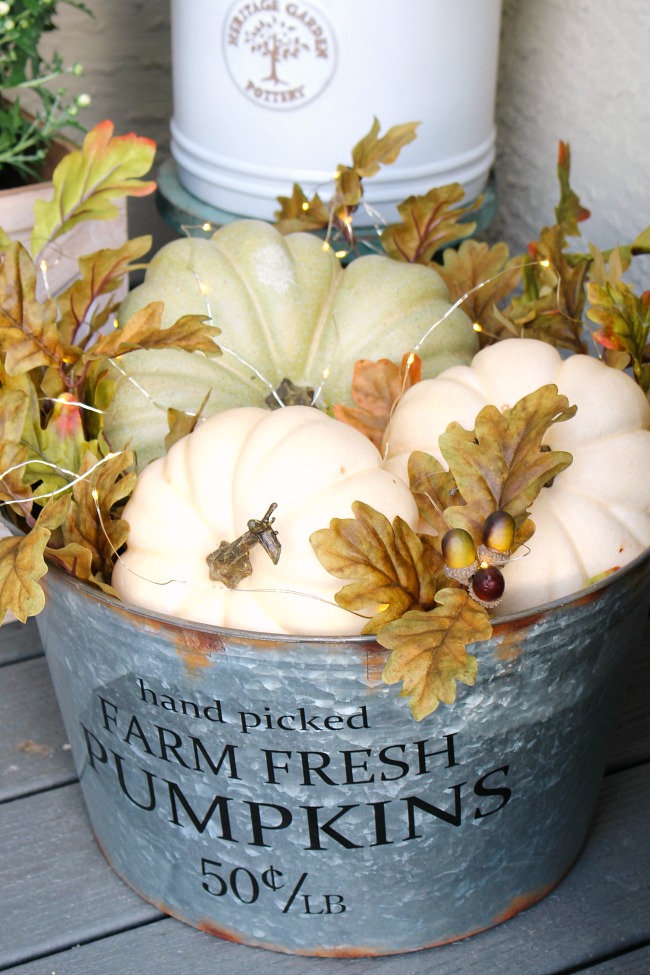
LIghted Fall Pumpkin Basket
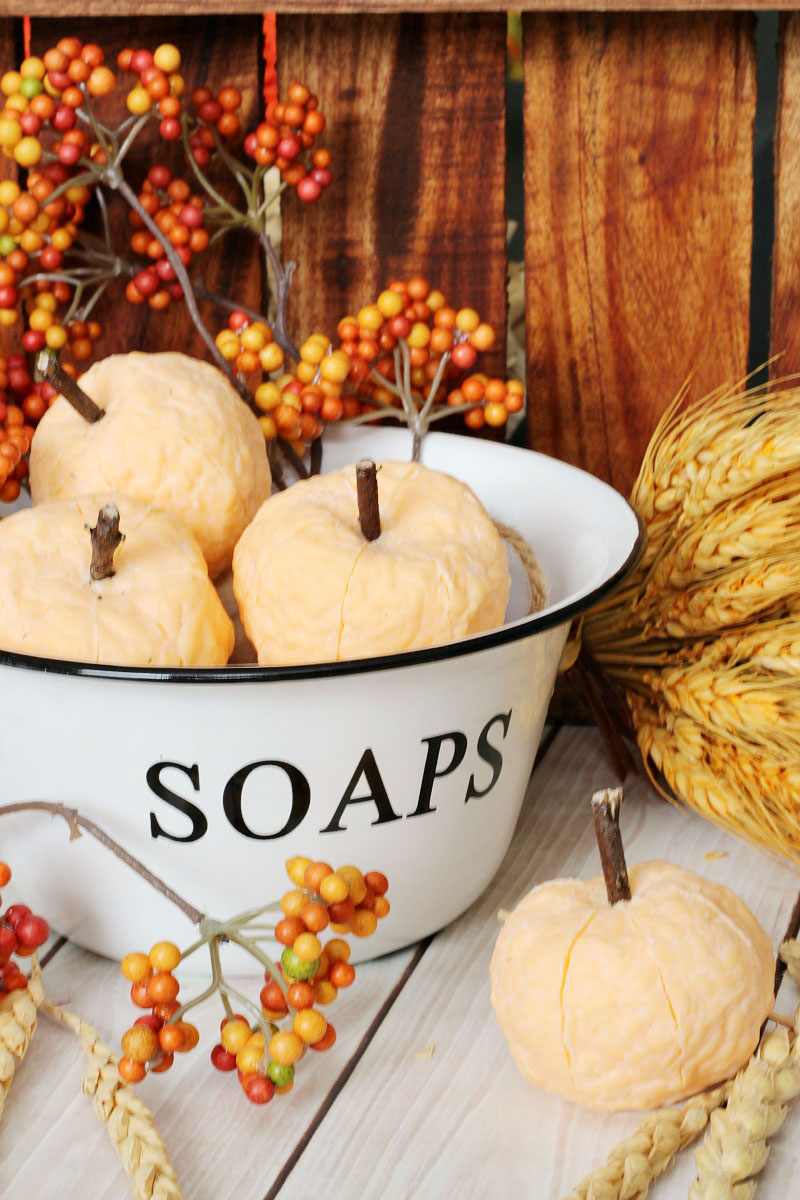
DIY Pumpkin Soaps

")


")